Monday, December 5, 2011

Happy B-Day B.!!

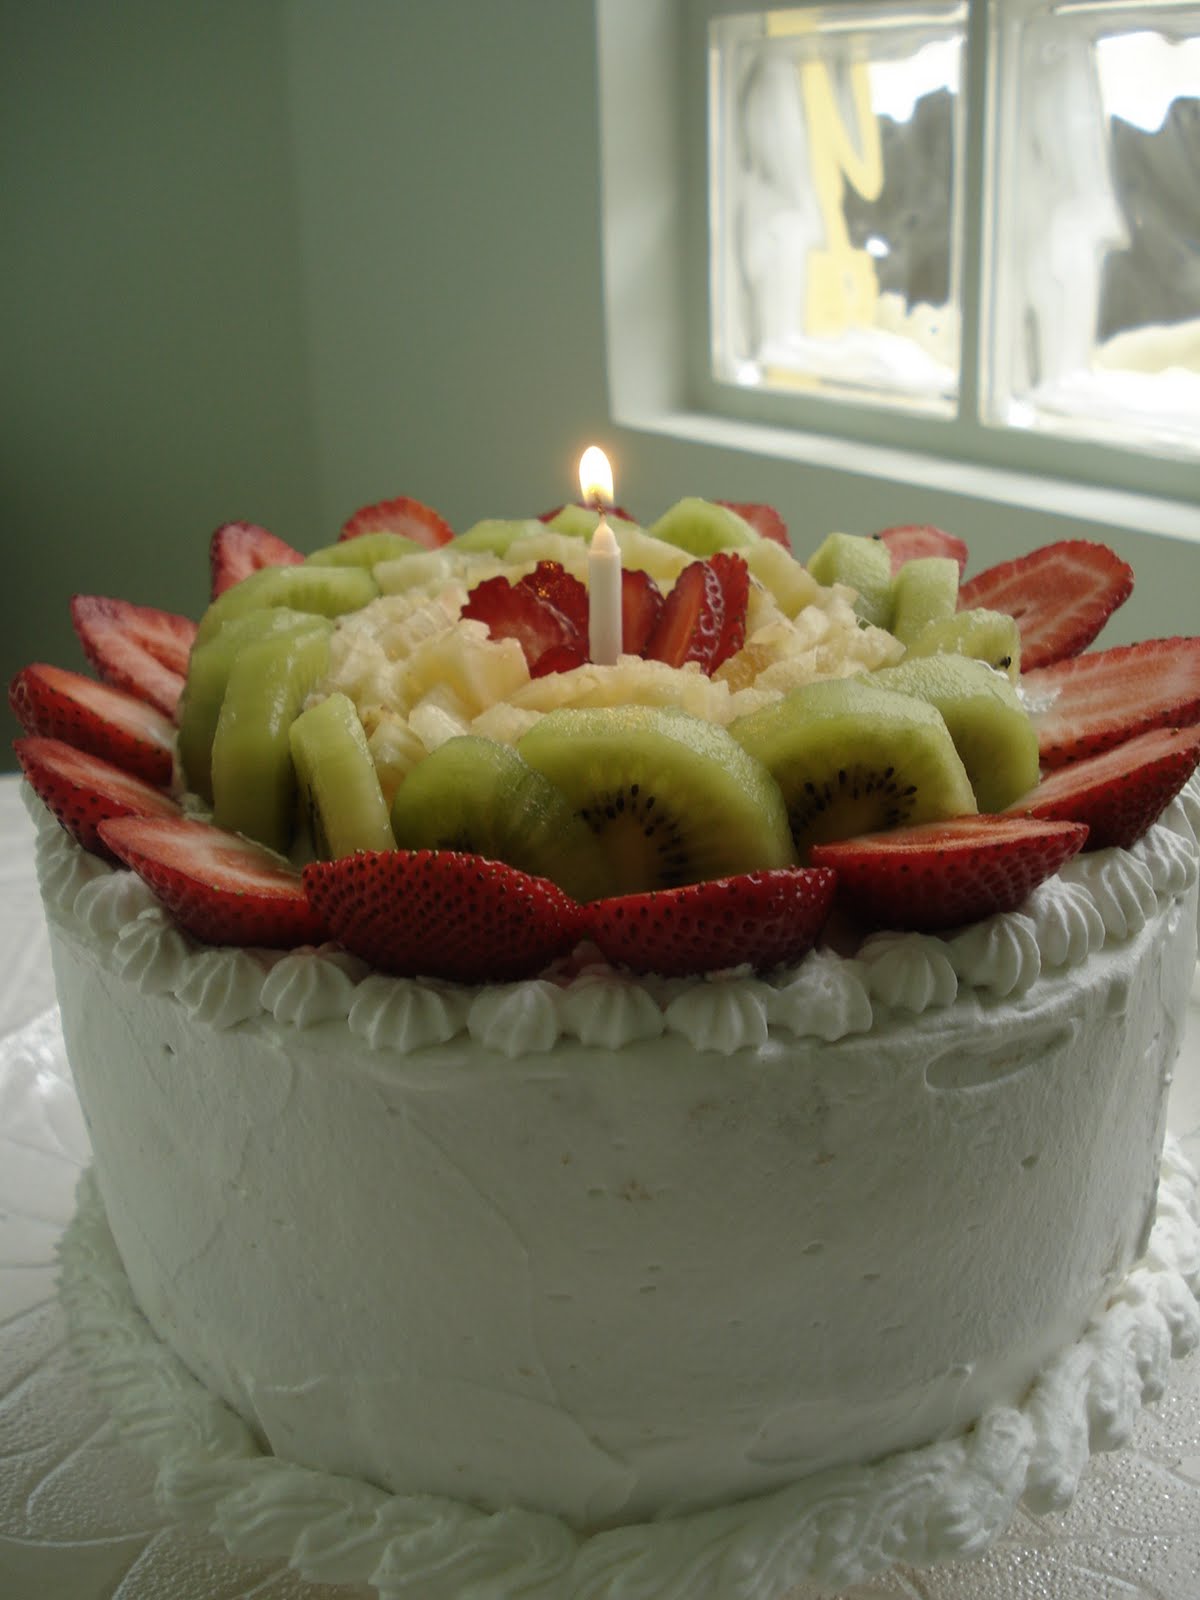
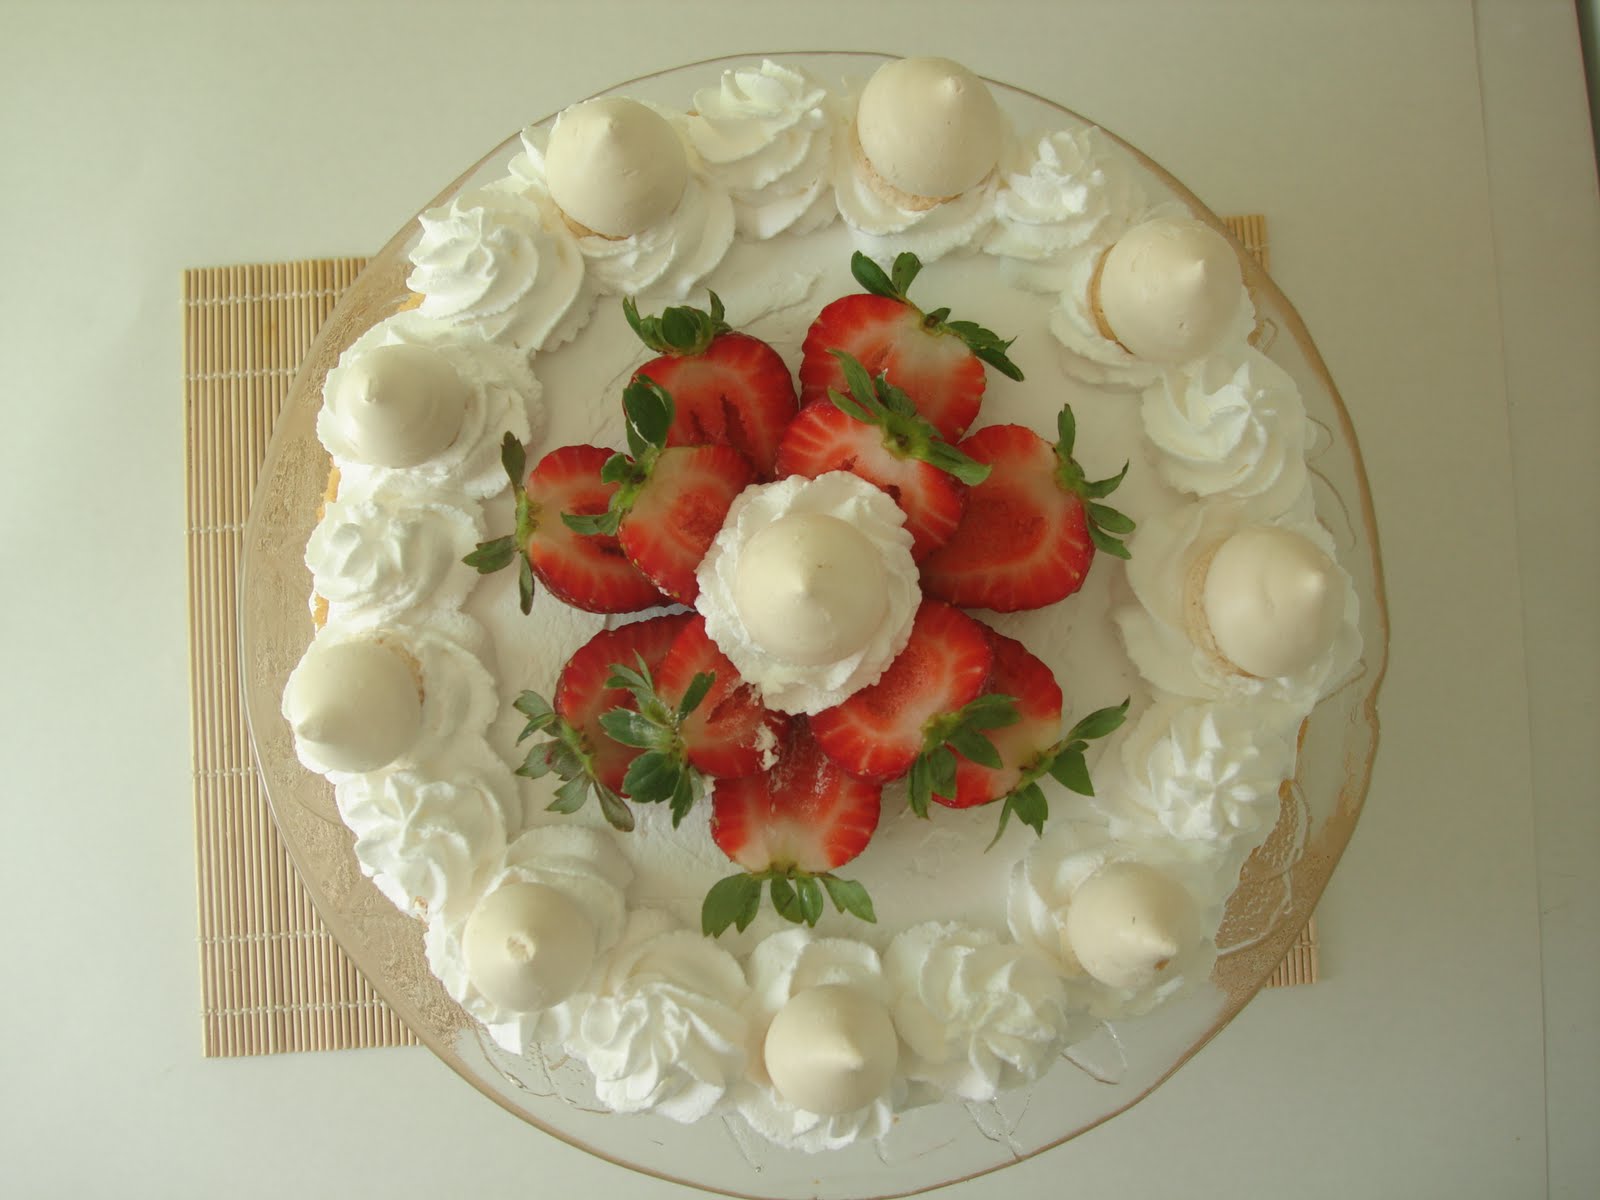
Last Thursday was lil'sis b-day and off course I made cake. She demanded asked for a Cookies and Cream Cake, so Cookies and Cream Cake it was. And it had to look EXACTLY like this one. Yeah, she's kinda bossy...but it was her birthday so...
I have to admit that she did a great choice, though. This cake is amazing! So moist, and fluffy, and light. Not too sweet, just the way we like it. Perfect. The only change I made was to use whipped cream instead of buttercream. Oh, and I added crushed cookies to the filling. =D

PS.: Dec 1st was Ann's mother's birthday,too, so I'm also dedicating her this cake. Elaine, I hope you had an amazing day and have many more birthdays to come. Happy (belated) Birthday!! =)

~Ana

Cake
1 1/4 cups All-purpose Flour
2/3 cup Dutch-process cocoa powder (or Hershey's Special Dark)
1 1/2 tsp Baking Soda
1/2 tsp Baking Powder
1/2 tsp Salt
3/4 cup Unsalted Butter
1 1/2 cups Sugar
1 tsp Vanilla
3 large Eggs, room temperature
1 1/4 cups Buttermilk

Frosting/Filling
600ml whipping cream
Sugar, to taste
Crushed Oreos - 4-5

For the cake:

1. Preheat oven to 350F/180ºC. Prepare two 8-inch cake pans with butter and flour.
2. Into a medium bowl, sift together flour, cocoa powder, baking soda, baking powder, salt. Set aside.
3. In the bowl of a standing mixer, or a large bowl using a hand held mixer, beat together the butter, sugar, and vanilla until light and fluffy. About 3 minutes. Add the eggs one at a time, beating until incorporated and scraping down sides as needed.
4. With mixer on low speed, add 1/3 of the dry ingredients, mix until incorporated. Then add 1/2 of the buttermilk, mix until incorporated. Repeat until the last 1/3 of flour has been used. Mix until incorporated and then beat for 1 additional minute. Batter might look curdled but it's okay.
5. Divide the batter evenly between the two prepared pans. Bake for 35-40 minutes, or until a toothpick inserted into the center comes out clean and the sides begin to pull away from the edges. Allow to cool in the pan on a wire rack for 10 minutes. Turn the cakes out onto the racks and allow the cakes to cool completely. I used just one 9-inch cake pan and baked for aprox. 1 hour.


For the filling:
1. Beat  2/3 of the whipping cream and sugar until soft peaks form. 
2. Fold in crushed Oreos.

For the frosting:
1. Beat remaining whipping cream - with sugar to taste- until stiff peaks form.


Cake Assembly:
1. When the cakes are completely cool, cut each cake in half  horizontally. Use 1/3-1/2 cup of frosting to fill between each layer. When all the layers are stacked, set aside 1/2 cup of frosting then use rest to frost the outside.*
2. Using a ziploc bag and a rolling pin, crush all but 7 of the Oreo cookies. Apply the cookie crumbs to the sides of the cake*
3. Use the reserved 1/2 cup of frosting to create 7 swirls on the top of the cake, place a cookie in each swirl.


*I assembled the cake inside the cake pan and left covered with foil overnight in the fridge. Next day, I used a foam plate, smaller than the cake pan, as a base - you can use a cardboard wrapped in plastic wrap; inverted the cake, frosted with whipped cream - spreading a thick layer on top.
Now comes the hard part: using a spatula, try to lift the cake, together with the cardboard, and slide it into your palm. Be careful not to lift too much or the cake will tumble. Follow step 2. I find it easier and less messy to do this step with a rectangle pan or parchment paper underneath, or else you will end up with cookie crumbs all over your kitchen. Set on a nice cake plate. 


Recipe taken from Sunny Side Up in San Diego, that adapted from Family Circle Magazine, February 2009.

=B

Sunday, November 20, 2011

Chocolate Marble Cake

I have quite a collection of baking pans and tools, however, as much as I like baking cakes I do not own a pair of round 8 inch cake pan nor a springform pan, which are essential pans for cakes. I keep promising myself that I will buy a set of cake pans, but because I am a professional procrastinator, I never get around to it. Hence this week, I am adding another quick bread/cake recipe, a chocolate marble bread, taken from Joy of Baking.com.

The writer stresses the importance in using real vanilla extract in vanilla based recipes, rather than imitation vanilla which leaves a bitter aftertaste. I have to admit that this is the first time I've used vanilla extract in a recipe on OSSD, and I could definitely taste the difference between real and imitation vanilla.

When making the marble bread, I remembered Ana's attempt at making a marble cake a while ago which did not have the swirls that she wanted. I was kind of worried that mine would turn into a mess as well, but I wanted to take on the challenge, and it didn't turn out so bad for my first marble cake ever. The only thing I screwed up on was not dividing the batter 50/50 so there was more chocolate than vanilla batter, but other than that, it turned out pretty good.

~Ann

Chocolate Marble Cake*

4 ounces (115 grams) semisweet or bittersweet chocolate, chopped (I used bittersweet chocolate chips)

1/2 cup (120 ml) milk, divided

1 1/2 cups (195 grams) all purpose flour

2 teaspoon baking powder

1/4 teaspoon salt

1/4 cup (60ml) sour cream or plain yogurt

1/2 cup (113 grams) unsalted butter, room temperature

3/4 cup plus 2 tablespoons (170 grams)granulated white sugar

2 large eggs

1 teaspoon pure vanilla extract

Direction

1. Preheat the oven to 325F degrees and place rack in the center of the oven. Butter and lightly flour a 9 X 5 X 3 inch loaf pan. Line the bottom of the pan with parchment paper.

2. Melt the chocolate, along with 1/4 cup of the milk, in a stainless steel bowl that has been placed over a saucepan of simmering(Not boiling!)water. Remove from heat and set aside.

3. In a small bowl whisk the sour cream with the remaining 1/4 cup milk, and the vanilla extract.

4. With an electric mixer, beat the butter and sugar until light and fluffy. Beat in the eggs, one at a time, until well combined. Scrape down the sides of the bowl as needed. With the mixer on low speed, alternately add the flour mixture and sour cream/milk mixture, in three additions, beginning and ending with the flour. Spoon half of the batter into a separate bowl. Add the melted chocolate mixture to one half of the batter and fold in.

5. With two spoons, place spoonfuls of the two mixtures into the prepared loaf pan alternately (chocolate, white, chocolate, etc.) Run a wooden skewer or knife through the two batters to achieve a marbled effect. (Be careful not to over mix or you won't get the marble effect.) Bake in preheated oven for about 50-55 minutes or until a toothpick inserted in the center comes out clean.

6.Remove from oven and place on wire rack to cool for 10 minutes before removing from pan. Cool completely.

Makes 1 loaf

*Recipe taken from Baking with Passion by Dan Lepard and Richard Whittington

Tuesday, November 8, 2011

Today is a special day!

Happy Birthday Ann!!!
I can't believe another year has passed since we last celebrated your birthday...Time really flies. I wish I could be there to celebrate with you again this year. =( But since I can't, I'll leave a special message for you.


I wish you all the best in the world! And may all your dreams come true and all your goals be achieved.You are a great friend and a great person. I'm glad I had the chance to meet you.  I love ya and miss ya! Sometimes life can be hard but know that something awesome is in store for you. =) Don't ever give up. Keep strong, with a smile on your face and positive thinking. And when things get tough remember: breath in...and out, in....and.... hehe.

I hope you have a great day! Oh, and have cake! (I would sugest Dimitri's huge waffles and/or cakes ;))

~Ana.


PS: I hope you liked the cake. I know we did. ;)
PPS: No recipe today, guys. Sorry. Busy with final terms...=(

Thursday, October 27, 2011

Low Fat Bran Muffins

I have a confession to make: I love bran. I love bran cereal, bran muffins, bran bread, granola bars made with bran, etc. Hence this week I made a batch of Low Fat Bran Muffins for my family and me. I got this recipe from I Love Muffins.ca. So if you are looking for a sweet but "healthier" breakfast option, try this out.

~Ann

Low Fat Bran Muffins

1 1/2 cup wheat bran

1 cup low-fat milk

1/2 cup unsweetened applesauce

1/2 banana-mashed

2/3 cup brown sugar

1/2 teaspoon vanilla

1/2 cup white flour

1/2 cup whole wheat flour

1 teaspoon baking soda

1 teaspoon baking powder

1/2 teaspoon salt

1 cup raisins or blueberries or dried cranberries (I omitted the fruit)

Directions

1. Preheat oven to 375F and line muffin tins with paper liners or grease well.

2. Mix togher wheat bran and milk and let stand for about 10 minutes.

3. In a large bowl, mix together aplesauce, banana, brown sugar and vanilla. Add to the bran and milk mixture. Stir in the flour, baking soda, baking powder and salt.

4. Gently fold in raisins (or other dried fruits.)

5. Fill muffin tins almost to the top and bake for 15-20 minutes.

Saturday, October 15, 2011

Lime Cake

Hey guys! Today I bring you this simple yet delicious Lime Cake. My sister made it a while ago and it was a huge success so I decide to share it with you. =) So light, fluffy, moist, and tangy. Yum! And the process couldn't be easier - and faster: just blend and mix. Simple as that. Perfect for any time of day - and night. ;)
Sorry for the short post. My inspiration is on vacations today. Hahaha.

~Ana.


Cake
1 cup vegetable oil
1 cup milk, room temperature
4 eggs
Zest and juice of 1 lime
2 cups sugar
Pich of salt
3 cups all-purpose flour, sifted
1 tablespoon baking powder

Frosting
1 can sweet condensed milk
5 tablespoons butter, room temperature (~100g)
1/3 cup lime juice

Start with the frosting
1. Mix all the ingredients with a wooden spoon - a mixer would be fine, too - until smooth.
2. Put in the fridge until it thickens. I recommend making only half the batch.

For the cake
1.Put oil, milk, eggs, lime juice, sugar, and salt in a blender and blend until smooth.
2.Transfer into a large bowl and mix in the flour, baking powder, and lime zest.
3. Pour into a lined rectangular (25x35cm) baking pan and bake for 40 minutes in a preheated oven (180ºC).
4. Do the cake test. Let it cool before frosting. Decorate with lime zest.
5. Serve it cool or at room temperature.


Sunday, October 2, 2011

Fruit Tea Loaf

A few days ago my mother was in the mood for some cake, so I flipped through Cakes Galore (a gift from Ana) and decided upon baking Fruit Tea Loaf. My mother loves fruit cakes and adding tea was unsual, but I was curious to see how it would turn out. To my surprise the cake took two days to make. It is not difficult at all for on day one you mix the fruits, spices and liquid together and store it overnight for the contents to saturate. Day two you add the flour and dump the batter into a bread pan-easy! My mother liked the cake, however my only reservation was that it looked nothing like the cake in the book. Now I know the cooking or baking results won't replicate the exact image in cookbooks, but my cake was really, really ugly. I will make another fruit cake for the holiday season, but probably not this one.

~Ann

Fruit Tea Loaf

2 Cups mixed dried fruit, such as golden raisins, currants, raisins, and canded cherries

Generous 1/2 cup light brown sugar

2/3 cup brewed tea (the author suggests using Earl or Lady Grey tea for a scented flavour, I used Earl Grey)

2 teaspoons ground allspice

Finely grated zest of 1 orange (I used 1 lemon instead)

1 Tablespoon clear honey, warmed

Directions

1. Place the mixed dried fruit, sugar, butter, tea, and allspice in a saucepan. Cover and heat gently until the butter has melted, stirring occasionally. Bring to the boil and boil for 1 minute, then remove the pan from the heat. Add the orange zest, then set aside and leave overnight.

2. Preheat the oven to 350F. Grease and line a 8 1/2 inch loaf tin.

3. Fold the sifted flour into the fruit mixture. Spoon the mixture into the prepared pan and smooth the surface. Bake in the oven for 50-55 minutes, or until golden brown and a skewer inserted into the center comes out clean.

4. Remove the cake from the oven, brush the top of the cake with wamred honey, then leave it to cool completely in the pan. Turn out and serve in slices spread with butter, if you like.

Friday, September 16, 2011

Banana Hazelnut Dessert Wontons

Flipping through the newspaper 24H, I came across a deliciously looking recipe called Banana Hazelnut Dessert Wontons. It is an easy and quick recipe to follow with a baking time of only 5 minutes. After making a batch of these, I have to admit that they were not my favourite. I thought the banana and Nutella would have made these wontons amazing, but my taste buds were not feeling it. I will post the recipe anyway, and if you have the ingredients, you can try it out for yourself and see what you think.

~Ann

Banana Hazelnut Dessert Wontons

1 medium banana peeled and diced

1/4 cup chopped pecans

1/4 cup brown sugar

16-20 wonton wrappers

1 egg lightly beaten

1/3 cup hazelnut spread

Powdered sugar

Directions

1. Preheat the oven to 400F (200C). Stir together banana, pecans, and brown sugar in a small bowl.

2. Lightly brush the edges of each wonton wrapper with beaten egg. Spoon about 1 teaspoon of hazelnut spread and 1-1/2 teaspoons banana mixture in centre of each wonton.

3. Fold over each wrapper, forming a triangle and seal edges well. (Instead of folding each wonton, I covered the banana and hazelnut wonton with an extra wrapper and sealed the edges, making a square shape)

4. Place wontons on baking sheet sprayed with nonstick cooking spray. Brush the tops of the wontons lightly with lightly beaten egg.

5. Bake 5-6 minutes or until lightly brown. Cool slightly and sprinkle with powdered sugar.

Wednesday, September 7, 2011

Whole Wheat Banana Bread

Hey hey hey, let's bake a cake! Again. But cake's always good. ;)
Besides, this banana bread is super good for you. It's made with whole wheat flour (fiber), nuts (antioxidant) bananas (potassium) and coconut (er..hm..fiber?). See? All good stuff. =)
This is the best banana bread I've had so far. Seriously. It is at the top of my banana bread list. Go make some for you! ;)


3 cups whole wheat flour - I used 2 c. whole wheat and 1 c. all-purpose and worked out fine
1 teaspoon baking soda
3/4 teaspoon salt
3 large eggs
2 cups brown sugar - I used 3/4 c brown sugar and 3/4 caster sugar
1 cup vegetable oil
1 tablespoon vanilla extract - I used 1 teaspoon vanilla essence
1 tablespoon banana extract - I ommited
1 1/2 cups very ripped bananas, mashed (about 3 bananas)
1 cup shredded coconut
1 cup pecans, toasted and chopped - I used Brazil nuts
1/2 cup buttermilk

1. Preheat oven to 350ºF/180ºC. Grease the pan with butter.
2. In a small bowl, sift the flour, baking soda, and salt. In another large bowl, whisk the eggs, oil, and sugar. Add the flour mixture to the eggs mixture, mixing with a spoon/spatula.
3. Add vanilla and banana extracts, mashed bananas, coconut, nuts and the buttermilk, mixing until incorporated.
4. Pour into the pan and bake for 60-65 minutes. Let it cool for about 10 minutes before removing from the pan.

PS.: I poured half the batter into the pan, arranged some banana slices over it and topped with the rest of the batter.

Recipe taken from here (in Portuguese).


Friday, September 2, 2011

Pineapple Upside-Down Cake

A few week ago I received an email from Ana informing me that in August our blog Oh So Sinfully Delicious would be a year old. I was totally taken by surprise. I couldn't believe that a year has gone by so quickly. Contributing to this blog has been a great experience for me. I got to learn so much about baking, photography, and blogging, and even though I have not contributed much for the past few months, I am keen on baking and doing more food writing.

A few months ago I purchased Cooking: A Commonsense Guide, ed: Jane Price, and Justine Upex. It's a cookbook for people who can't cook or have little experience in the kitchen. What I like about this book is, it breaks down cooking into introducing different elements, from various pots and pans that are needed, to the different cuts of meats, poultry, and seafood so when one is faced with a recipe it's not as intimidating as one may suspect.

From Cooking, I baked a Pineapple Upside-Down Cake. Traditionally this cake is topped with whole pineapple slices garnished with maraschino cherries, but this recipe omits the cherries and slices the pineapples in half. It's a different design but tastes just as good.

~Ann

Pineapple Upside-Down Cake

20g (3/4 oz) butter, melted

2 tablespoons soft brown sugar

440g (14 oz can pineapple slices in natural juice

90g (3oz) butter

1/2 cup (125g/4oz) caster sugar (I used granulated sugar)

2 eggs, lightly beaten

1 teaspoon vanilla essence

1 cup (125g/4 oz) self-raising flour

Directions

1. Preheat the oven to moderate 180C (350F). Grease a 20 cm (8 inch) ring tin. Pour the melted butter into the tin and tip to coat the base evenly. Sprinkle the brown sugar over the butter. Drain the pineapple, reserving 1/3 cup (80 ml) of the juice. Cut the pineapple pieces into halves and arrange over the brown sugar.

2. Using electric beaters, beat the butter and sugar in a small bowl until light and creamy. Add the eggs gradually, beating well after each addition. Beat in the vanilla essence.

3. Transfer the mixture to a large bowl. Using a metal spoon, fold in the flour alternatively with the reserve pineapple juice.

4. Spoon the mixture evenly over the pineapple and smooth the surface. Bake for 35-40 minutes, or until a skewer comes out clean when inserted into the centre. Leave in the tin for 10 minutes, then cool on a wire rack.

Thursday, August 25, 2011

1st year celebration cake!

Wow! Time flies, doesn't it? Can you believe it's been a year since we started this blog (well, a year and almost a month now...oops!)?
So, to celebrate the first year of OSSD I made... surprise... surprise... cake! It's very similar to the Mother's day cake I've posted a while ago. The only difference is that I added a thin layer of  sweetened condensed milk and lime mixture (recipe below) before spreading the whipped cream and strawberries, just to give a little tanginess. I also frosted the cake with whipped cream and put mixed fruit on top. The final result: Oh so sinfully delicious! =D


For the cake recipe and how to assemble the cake, click here.

Lime filling:
1/2 can sweetened condensed milk
Juice of 1 lime - or as much or as little as you want.

Mix with a spoon or a fork the condensed milk and juice. Let it sit for 5 minutes to thicken.


Saturday, July 23, 2011

Coconut Cream Pie

This coconut pie is so good we've made it several times now. Just remembering it makes my mouth water. Seriously. I won't say this is the best coconut pie I've ever had, but it's very, very close. And it's perfect  for you folks enjoying summer because is a no-bake, super fast dessert. =)
I'm off to enjoy the cold weather. Brrr. Have a great weekend!


200g Maria type cookies
100g (7 tablespoons) butter, softened

1/2 can sweetened condensed milk
320ml (1 1/3 cup) milk - used wholemilk
2 tablespoons cornstarch
3 eggyolks
100g shredded coconut
1 cup whipping cream

1. Start toasting the coconut. Preheat oven to 375ºF/ 190ºC. Spread coconut evenly in a baking sheet. Put in the oven and, this is super important, keep an eye on it at all times! It can go from golden to black in seconds. 10 minutes should be enough, but it'll depend on your oven. Stir every 5 minutes to make sure all sides are browned evenly. It's ready when golden brown. Let it cool.
2. Finelly crush the Maria cookies in a food processor, or in a blender. Transfer to a bowl and add the butter. Mix with your fingertips untill all the butter is combined. 
3. Transfer to a 8-inch springform pan or pie dish and press evenly into the bottom and sides. Keep aside, or in the fridge if you want.
4. Make the filling: Combine condensed milk, milk and cornstarch in a heavy-bottomed pan. Whisk until the cornstarch is dissolved.
5. Put a sift over the pan and strain the eggyolks. Put over medium heat whisking constantly until it thickens.
6. Pour over pie crust and let it cool completely.
7. Whip the cream to stiff peaks. Spread over coconut cream and sprinkle with toasted coconut.

Adapted from here (In Portuguese).

Wednesday, July 13, 2011

Super Fluffy Pancakes

This is my favorite pancake recipe. I lost count on how many times I've made them since Ann gave it to me last year. More than I should have, I guess. But what can I do, they are that good. Seriously. You should try it this weekend. Or tomorrow for breakfast, why not? They take no time to make and they freeze well, too. That way you can have pancakes for breakfast whenever you want! Do it, do it now!


2 cups all-purpose flour
3 teaspoons baking powder
1/2 teaspoon salt
1/2 cup sugar
1 cup milk, room temperature
4 tablespoons unsalted butter, melted
2 eggs

1. Sift together flour, baking powder, salt, and sugar in a large bowl.
2. Add milk, butter, and eggs and whisk until incorporated.
3. Heat a butter-greased frying pan over medium heat and pour the desired ammount of batter.
4. Brown both sides.
5. Serve with fresh fruits and syrup.

Notes:
-Let the pancakes cool before freezing, rolled in foil or in a tightly sealed plastic bag.
-Defrost in microwave, without foil, for aprox. 1 minute.

~7-8 pancakes.
Unfortunately, Ann forgot where she took this recipe from.

Monday, June 27, 2011

Strawberry Frozen Yogurt

As promised on my last post, here's a refreshing, delicious summer recipe for you. This frozen yogurt is soooooo good, you have no idea. And is super easy, requires no ice-cream maker and no more than 3 ingredients - 4 if you count the salt, but everybody has is at home, right? And what is best, you can finish those strawberries you can no longer eat 'cause you were greedy and bought 4 packs last week. Don't worry, I'm not judging you. If I lived in a country with suculent, sweet and huge strawberries, I would buy tons of it whenever I could, too. ;)


400g plain yogurt
200g sweet condensed milk (1/2 can)
Pinch of salt
~250g fresh strawberries

1. Place strawberries into a blender or food processor and process until they are pureed. Pass through a fine sieve and measure 1/3 cup (75ml). You can keep the remaining puree for another batch.
2. In a metalic bowl, whisk together all ingredients until combined. Place in the freezer and whisk every 30 minutes, for 2 hours.
3. Let it freeze for another 2 hours. Take out from the freezer and let it stand for 10-15 minutes to soften. Mix with a hand mixer until smooth (this step is optional). Return to freezer until it sets.

Recipe adapted from the Passion fruit froyo from this blog. (In portuguese)

Wednesday, June 22, 2011

HAPPY BIRTHDAY ANA!
You have been a great friend and an inspiration to me when it comes to exploring and expanding my passion in baking.
Since I cannot be in Brazil to celebrate your birthday (even though I would love to!) I decided to bake something special for you instead. So my gift to you is Red Velvet Cupcakes. I decided to bake these for you for two reasons: 1) The first time I've ever had red velvet cupcakes was in Brazil, and 2) You're a cupcake fanatic.
These cupcakes were awesome-just like you. I love you, and miss you Ana!
With Birthday Hugs and Kisses
-Ann
Red Velvet Cupcakes*
2 1/2 cups sifted cake flour
1 teaspoon baking powder
1 teaspoon salt
2 tablespoons unsweetened cocoa powder
2 oz. red food coloring (two bottles)
1/2 cup unsalted butter, softened
1 1/2 cups sugar
2 eggs, at room temperature
1 teaspoon vanilla extract
1 cup buttermilk, at room temperature
1 teaspoon white vinegar
1 teaspoon baking soda

Directions
1. Preheat oven to 350 degrees. Line two 12 cup muffin tins with cupcake liners.
2. Sift together the cake flour, baking powder, and salt in a medium bowl and set aside. In a smaller bowl, mix food colour, and cocoa powder to form a thin paste without lumps and set aside.
3. In a large bowl, using a hand mixer, beat butter and sugar together until fluffy. Beat in eggs one at a time, then beat in vanilla and the red cocoa paste, scraping down the bowl with a spatula as you go.
4. Add 1/3 of the flour mixture to the butter mixture, mix, then beat in 1/2 of the buttermilk.
5. Beat in another 1/3 of the flour mixture, then add the second 1/2 of the buttermilk. Add the last 1/3 of the flour mixture, and mix until well combined, making sure to scrape down the sides with a spatula.
6. In a small bowl, mix vinegar and baking soda. Add vinegar mixture to the cake batter and stir well to combine.
7. Fill cupcake cups with cake batter untill they are a little under 3/4 full.
8. Place muffin tins in preheated oven. Bake for approximately 20 minutes, rotating pans halfway through.
9. Cool for ten minutes, and frost and decorate the the tops.
*This fabulous recipe was taken from bestcupcakerecipes.blogspot.com

Saturday, June 11, 2011

Orange Poppy seed Muffins

Hi, all!I'm back and I brought you some muffins. =) I know you're all enjoying the sun and beautiful sunny days, and all you want is a cold refreshing treat. But I'll leave that for my next post, okay? It's getting colder and colder - brrr- around here and all we want is a right-out-of-the-oven treat with a hot beverage. ;)


Adapted from this book
300g self-rising flour
1/4 teaspoon baking powder
125g caster sugar
2 tablespoons orange zest
185ml buttermilk
1 teaspoon vanilla
2 eggs, ligtly beaten
110g unsalted butter, melted
Poppy seeds - I didn't measure it but I think 2 to 3 tablespoons should be enough.

1. Preheat oven to 200ºC/390ºF. Line a muffin tray with paper liners.
2. In a large bowl, sift together  flour, baking powder, poppyseeds, and sugar. Add the orange zest and make a well in the center.
3. In a small bowl, mix together buttermilk, eggs, and vanilla.
4. Pour the buttermilk mixture and the melted butter into the flour mix and stir with a fork/whisk jut until combined. Do not overmix - a few flour lumps is ok.
4. Fill the muffin cups and bake for about 12 minutes, or until a skewer comes out clean. Let it cool  for 5 minutes before removing from pan.

Makes 12 muffins.

Tuesday, May 17, 2011

Apple Cake (w/ skin)

Today I bring you another cake, not a fancy, layered cake, but a humble yet delicious apple cake. Perfect for  a chilly afternoon snack along with a cup of tea. =)
What I like the most about this cake is that there's no waste since you use the whole apple - well, except for the seeds, but you can keep them and plant an apple tree. Who knows, maybe oneday you'll be making this apple cake with your own apples. ;) Haha.
Bake on, people!

-Ana
Apple Cake (with skin)

I took this recipe from a brazilian website but I can't find it anymore. =s

1 cup vegetable oil
4 eggs
1 1/2 cups caster sugar
3 apples - I used Fuji apples
2 1/2 cups all-purpose flour
1 tablespoon baking powder
Ground cinnamon, to taste - I used 1 teaspoon
1/2 cup raisins - optional
You can also add nuts, like hazelnuts or cashew nuts

1. Preheat oven to 350ºF/180ºC. Grease and flour a cake pan.
1. Peel the apples and save the skins. Chop the apples into cubes.
2. In a blender, add the oil, eggs, sugar and apple skins and blend until smooth.
3. In a medium/large bowl, sift together flour, baking powder and cinnamon. Add the wet ingredients and mix well. Add the chopped apples, raisins, and nuts and mix.
4. Bake for 40-50 minutes or until a toothpick inserted in the centre of the cake comes out clean. Let it cool for 15-20 minutes in the pan.

Thursday, May 5, 2011

Mother's Day Cake

Hey, everybody! I'm back! These past few weeks have been a litlle busy around this part of the world. Lots of studying and paperworks to do. *sigh* Things are not quite back to normal yet - and I think they won't be 'til the end of June (end of the semester, yay!)- but I wanted to leave a special post for Mother's Day which is right around the corner!
I actually made this cake for my mother's b-day, a couple of weeks ago, and what I really liked about it is the decoration, with the visible layers and the arranged strawberries and meringues on top. Modesty aside, I think this is the prettiest cake I've ever made. =) And it's pretty simple to assemble. I took the idea from here (in Portuguese). Make this cake for your mother, she deserves it! I guarantee she will love it!

To all mother's out there: Happy Mother's Day! Enjoy your so deserved day  and eat cake if you can. =D

-Ana

Strawberry Meringue Cake

You can use your favorite yellow cake recipe. Here's the one I used:
8 egg yolks
1 cup milk, warm
3 cups refined white sugar
4 cups all-purpose flour
1 tablespoon baking powder
8 egg whites

Whipping cream, around 500 ml, beaten.
Around 2 packs of strawberries
Meringues, around 150g.

1. Preheat oven to 350ºF/180ºC. Grease the bottom and sides of a cake pan (sorry, don't know what size I used.) with butter and line the bottom with parchment paper, also greasing it with butter.
2. With a stand mixer, using the whisk attachment, beat egg yolks with milk just until combined. Add the sugar and beat for 20 minutes, over mid-high speed. After the 20 minutes you should be able to draw an 8 with a spoon and it will hold that 8-shape for a few sconds.
3. Using a spatula, fold in the flour and baking powder. I suggest you sift a little bit of the flour over the mixture and fold, repeating until flour is over. Don't forget the baking powder.
4. Beat the egg whites until stiff picks form and fold into the cake batter.
5. Bake until tooth-pick inserted in the centre comes out clean. I forgot to time it but it should take 40 minutes or longer. Just keep an eye on it. Let it cool completely. You can make the cake the day before.
6. Divide the cake in 3. Place the top layer facing down onto a nice cake stand and drizzle with milk, syrup or soda, like Sprite or a similar clear lemon drink (not Coke, please.). Note: If your cake is already moist, skip this step. My cake was more on the dry side.
7. Spread the whipping cream, arrange the strawberries and the meringues. Do not crush your meringues into tiny pieces because they will disspear and you won't taste them after.
8. Place the middle layer on top, drizzle with soda, spread whipping cream, arrange strawberries and meringues. Place the final layer and drizzle again. 
9. Spread a thin layer of whipping cream and decorate as you desire. Keep the cake refrigerated.


Wednesday, April 13, 2011

On Saturday afternoon I decided to make honey waffles for this week's challenge, so I picked a recipe and went to the kitchen. Waffles ready and hot, pictures taken, it was time to taste. It was good, fluffy, thin - blame my regular (not belgian) waffle machine. But it was just good, not delicious or oh-my-goodness-this-is-crazy-awesome, so I chose not to post them for you. I'll be posting some honey recipes I think will make you drool, instead. You're welcome.

How 'bout this Honey Rolls, from The Pastry Affair? Yes, please.


Or these Honey Biscuits from The Average Foodie?


Oh my, I could eat this Honey and Orange Cornmeal Cake for lunch! From Eat Good 4 Life.


Popcorn! Do I need to say more? From Cherry Tea cakes


Now clean the drool from your keyboard and go bake something with honey. It's healthy. ;)

Monday, April 11, 2011

Honey

I don't know what I was thinking when I suggested honey. It was so hard to find a recipe with honey as the main ingredient. I was feeling like making honey buns, but I kept finding honey bun cake, and you know what? Honey bun cake does not contain an ounce of honey-I don't get it. Anyway, from the relatively few recipes that I found online, I chose Old German Honey Cookies from allrecipes.ca. There have been good reviews from people who have baked these cookies, so I decided to try baking these for myself. I had to cut the amount in half because the quantity was enough to feed an army, but these cookies turned out surprisingly well. When I was making the dough, I thought about sprinkling some coarse cane sugar on top to add taste and texture. If delicate had a taste, these German honey cookies would be it. Without the cane sugar, they are light, fluffy, and pair quite perfectly with a warm beverage.

-Ann
Old German Honey Cookies

1 cup white sugar
1 cup shortening
1 cup honey
2 eggs
1 teaspoon vanilla
1 teaspoon baking soda
4 cups all purpose flour
1 teaspoon ground ginger
1/4 cup of coarse sugar (optional)

Directions

1. In a saucepan over low heat, melt together sugar, shortening, and honey. Let it cool.
2. Mix together eggs, vanilla, baking soda, and ginger. Gradually add to cooled honey mixture.
3. Slowly add 4 cups of flour to mixture. Stir until well blended. Drop by teaspoon onto cookie sheets about 2 inches apart.
4. Sprinkle some coarse sugar on top of each cookie. Bake at 350ºF/180ºC until golden (10-12 minutes).

Wednesday, April 6, 2011

Bundt Cake

This Marble cake didn't turn out the way I wanted. I mean, tastewise it was great. Light, fluffy, moist, yumy, but the marbled effect I wanted failed. =( It was my fault, though. I didn't follow Donna Hay's directions on how to get the marbled effect. I just put the plain batter and then dropped a few tablespoons on top and swirled with a toothpick. Oops. Next time I will stick with the directions. =)
I loved  these mini cakes, though. The pink batter is so cute! I'm in a girly girl mood these days. ^^
I halved the recipe and got 6 cute  mini cakes. Below you will find the full recipe from Donna Hay's Modern Classics 2.

-Ana

Marble Cake


250g (8oz) butter, softened
1 1/4 cups sugar
1 teaspoon vanilla extract - used essence
4 eggs
2 1/4 cups all-purpose flour
2 1/4 teaspoons baking powder
1 cup milk
Pink food colouring

1. Preheat the oven to 160ºC (325ºF). Place butter, sugar and vanilla in the bowl of an electric mixer and beat until light and creamy.
2. Gradually add the eggs and beat well.
3. Sift the flour and baking powder over the butter mixture and fold through with the milk. 
4. Divide batter in half. Colour one half with pink colouring.
5. Grease a 25 cm (10in) fluted (bundt) cake tin. Drop alternate spoonfuls of pink and plain cake mixture into the tin.
6. Swirl a butter knife through the mixture to give a marbled effect.
7. Bake for 50-55 minutes or until cooked when tested with a skewer. Cool on wire rack.

~Serves 8-10 ( or 6 in my case)


Monday, April 4, 2011

Bundt Cake

Things have been pretty crazy on my side of the earth for the past week or so, so making time to bake and blog was difficult, however I as much as I enjoy doing this blog, I did not enjoy making this next recipe which was a sponge cake. It has to be one of the hardest cake I have ever made. Two years ago I bought the summer 2009 Canadian Living Special Cookbook Issue. There was this one recipe that caught my attention which was a Blueberry Citrus Sponge Cake. It sounded delish, and the picture of the cake was mouth watering, so had set aside a steamy summer afternoon to make this cake and the process was not fun. I have eczema, which is a skin problem where I develop rashes all over my hands, and anything acidic that touches my skin burns. Because this is a citrus cake, it requires zesting and squeezing lemons and oranges. I tried to handle the fruits without actually touching the juice, which didn't work. Next, was the separation of eight egg whites, which was really messy, and frustrating since I couldn't separate them. Although the cake did not turn out bad at all, I did not enjoy making this cake at all. You would think that after making this cake two years ago I would change my mind about this cake, or even improve on the baking method, but I haven't on both accounts. When I was making this cake last night, I screamed so much I was afraid the neighbours may have considered calling the police. If separating egg whites is no feat for you, then be brave and try baking this cake. In my opinion it requires a lot of effort, but the results pay off-if you follow the recipe correctly.

  -Ann
Blueberry Citrus Sponge Cake

2 cups sifted cake and pastry flour
2/3 cup granulated sugar
2 teaspoon baking powder
1/4 teaspoon salt
1/2 cup vegetable oil
1 tablespoon grated orange rind
1/3 cup orange juice
2 teaspoon grated lemon rind
2 tablespoon lemon juice
2 teaspoon vanilla
8 egg whites (oh the horror!)
2 cups blueberries (I used one cup, but that's only because I didn't read the instructions properly and I bought enough to make one cup only) Glaze: 1/4 cup granulated sugar
1/4 cup orange juice

Directions
1. In large bowl, whisk together cake and pastry flour, granulated sugar, baking powder and salt.
2. In separate bowl, whisk together oil, orange rind and juice, lemon rind and juice, and vanilla; beat into dry ingredients until smooth and thick.
3. In another bowl, beat egg whites until foamy; beat in icing sugar, 1 tablespoon at a time, until stiff glossy peaks form. Fold 1/3 into batter; fold in remaining whites. Fold in blueberries.
4. Scrape into greased and flour dusted 10-inch (3 L) bundt or tube cake pan. Swirl knife through batter to remove air bubbles.
5. Bake in 350ºF (180ºC) oven until cake tester inserted in centre comes out clean, about 40 minutes. Let cool in pan on rack for 30 minutes.

Glaze
 Meanwhile in small saucepan, bring sugar and juice to boil, stirring; boil for 1 minutes. Let cool. Loosen cake from edges of pan. Invert onto rack; brush with glaze. Let cool.

~Makes 12 servings.

Wednesday, March 30, 2011

Coffee

Hi, there! Today is my turn to share with you my coffee recipe. I hope you like it. I know I did. =)

When Ann suggested coffee for this week's theme the first thing that came to mind was Tiramisu. So tiramisu it is. :) There's tons of tiramisu recipes out there, but  when I came across a Martha Stewart's recipe that claimed itself easy tiramisu, I knew I had to try it. 

I think they should rename it to easy AND delicious tiramisu.  I know it's not the traditional italian tiramisu but it's great anyway. Perfect for those moments when you are craving for tiramisu and don't want to spend 2 hours in the kitchen. This recipe is definitely a keeper. ;)


Adapted from here

1/2 cup strong coffee, cold
300g cream cheese, softened
1 1/2 cups heavy cream
2/3 cups sugar
200g soft ladyfingers
Cocoa powder for dusting, or milk chocolate shavings

1. Beat cream cheese, heavy cream and sugar until light and fluffy.

2. Cut ladyfingers in half and arrange them around a springform*, sugar side facing out. This step is optional, I wanted to give the tiramisu a more sophisticated look. You can make it in any dish you desire.

3. Spread some of the cream cheese mixture on the bottom of the pan - around 1 cup.

4. Dip ladyfingers, one by one, in coffee - no more than 3 seconds or it will fall apart; and arrange them over the cream.

5. Add more cream on top. Repeat layers, ending with cream.

6. Refrigerate. Dust with cocoa powder or chocolate shavings before serving. 

*Oops, I don't know the size of the pan I used. But it's a small one, the size of a dessert dish. ^^

~Serves 8.


Monday, March 28, 2011

Coffee

Don't you just love walking into someones home, or even being in your own home, and smell freshly baked cookies that just came out of the oven? That's how it is at my place now, as I just finished baking Mocha Truffle Cookies-yes, you read correctly, Mocha-Truffle-Cookies...it tastes as divine as it sounds. Now I have to admit, that I baked these last minute because my last batch was a disaster. When I was making the dough, I knew there was something off about it, but I couldn't put my finger on what it was, even my mother who checked out what I was doing, commented that the dough looked unusually dry. It wasn't until I started baking the first batch that I realized that I totally forgot to add sugar. Perhaps the missing sugar is partial to the crumbly effect of the dough, but I was also suspicious of the large amount of flour ( 2 cups) that the recipe calls for. When I re-did the recipe, I included all the ingredients accordingly-even the sugar, however I cut the flour to 1 1/2 cups. The texture was perfect, the cookies came out great, and I'm loving the smell of my home.

-Ann

Mocha Truffle Cookies*
1/2 cup butter/margarine 
1/2 cup chocolate chips
1/2 tablespoon instant coffee
3/4 cups sugar
3/4 cup brown sugar, packed
2 large eggs
2 teaspoons vanilla
2 cups flour (I advise you use 1 1/2 cups)
1/2 cup cocoa powder
1/2 teaspoon baking powder
1/4 teaspoon salt
1 cup chocolate chips

Directions

1. Melt butter with 1/2 cup chocolate chips in a large sauce pan. Remove from heat and stir in coffee crystals.

2. Cool five minutes and combine sugar, eggs, and vanilla with coffee mixture.

3. In a medium bowl mix flour, cocoa, baking powder, and salt. Stir into coffee mixture, then add remaining 1 cup chocolate chips. Drop by tablespoonful onto lightly greased baking sheets. (I used parchment paper.)

4. Bake at 350F for 10 minutes. Cool 1 minute before removing from pan to cool on wire rack.

*I wrote down the recipe years ago and didn't put the authors name, so I have no idea where I got it from, but I did not create this recipe...even though I kinda wish I did.

Time for Change

Over the past few weeks, we have made a few changes on Oh So Sinfully Delicious in order to keep it fresh, current, and as original as possible. One of our major changes is the overall design of the blog which came from Ana's discovery of Shabby Blogs. Since we cannot meet up and bake together ( if you were not aware before, we live in two different countries), each week we select a feature ingredient and bake something with that main ingredient. Yes, there is the chance that we may bake the same thing, or something very similar, but so far that has not happened yet. It's something different, but it works for us. We are still making significant changes in order to improve the aesthetics of the blog as well as to keep you more engaged in our entries. We have decided to split our entry into two parts, so on Mondays I (Ann) will post a recipe and on Wednesday Ana will post hers.

We are also trying to make our blog more visually friendly by adding more and bigger photos, as well as open up and add photos on Flickr. Although we have been posting for eight months now, we really have not introduced our selves, so we are planning to create a biographical page, so you can know more about us. The changes that we are making are experimental and as we fiddle around with our blog, we are totally open to suggestions on how to make OSSD a better blog. Thanks for your support!

-Ana & Ann

Monday, March 21, 2011

Apple

Hey Ya'll. First I want to start off by saying it's officially spring, yaaaaaaaay!!!!! The sun is setting later, plants are sprouting from the earth, and the best part is that the weather is getting warmer...until this Wednesday, when the temp is suppose to dip down and start snowing again-but the point is that technically, spring has arrived!

Below is an Apple Blueberry Crumble recipe that I got from Donna Hay's Modern Classics book 2. Now I have to admit that I am not a fan of baked apple recipes, people who know me, know that I find 'em slimy, so when I made this crumble, I happily shared this with the rest of my family. All I can say is that if you like apple pie, and strudels, you will love this crumble recipe.

-Ann

Apple and Blueberry Crumble

7 green apples (1.2 kg/2 lb 7 oz), cored and chopped (I used macintosh apples cause grannies are way too sour in my opinion.)
1 cup fresh blueberries
1/3 cup sugar
1 teaspoon finely grated lemon rind
2 teaspoons lemon juice

Topping
1 cup rolled oats
1/2 cup brown sugar
1/4 cup plain (all-purpose) flour
75g (2 1/2 oz) butter, softened
1/2 teaspoon ground cinnamon

Preheat the oven to 180C (350F). Place the apples, blueberries, sugar, lemon rind, and lemon juice in a bowl and stir to combine. Transfer to a large ovenproof dish. To make the topping, place the rolled oats, sugar, flour, butter and cinnamon in a bowl and mix to combine. Spoon the oat mixture over the fruit and bake for 55 minutes or until the topping is dark golden and crisp and the apple is soft. Serve warm with thick (double) cream or ice cream if desired.

~Serves 4


-----------------------------.~.~.~.~.~.~.~.~.~.~.~.~.~----------------------------

I LOVE fritters. That's why I don't make them so often - otherwise I would be 200 pounds by now. They are on my comfort food list. And perfect for a rainy day with a cup of tea. Or for any day, really. =)

This fritters are so light and fluffy that if I haven't practiced my self-restraint I'd have eaten them all by myself. Luckily I had some helpers/tasters this time. And they all gave thumbs up. =)

-Ana

Apple Fritters

From this amazing website - with step-by-step pics!
2 cups all-purpose flour
1/2 cup sugar
3 tablespoons sugar
2 1/4 teaspoon baking powder
1 1/4 teaspoon salt
2 teaspoons ground cinnamon
2 large eggs
3/4 cup whole milk
2 teaspoons vanilla extract
2 tablespoons melted butter
2 apples, peeled and diced - Ree sugests Granny Smith but I used Gala apples; you can use Fuji apples, as well.

1. In a mixing bowl, combine flour, sugar, baking powder, cinnamon, and salt.

2. In a separate bowl, beat the eggs with a fork, then add milk, melted butter, and vanilla.

3. Gently fold dry and wet ingredients together until just combined (do not overmix.) Fold in apples. Add enough apples to make a very chunky batter.

4. Heat a couple of inches of canola oil over medium to medium-low heat. When it gets hot, drop a little drop of batter into the oil. If it sizzles immediately and rises to the top, the oil is ready; if it burns quickly, turn down the heat.

5. Drop teaspoons of batter into the hot oil, six or eight at a time. Sometimes they’ll flip over by themselves; sometimes you have to flip them. Just watch them and make sure they don’t get too brown, but cook them long enough to make sure the batter’s cooked through, about 2 to 2 1/2 minutes total.

6. Remove and drain on a paper towel. Dust very generously with powdered sugar or roll them into a sugar and cinnamon mixture.

Serve warm!
**May be heated up the next day in a 350 degree oven for 8 minutes.

Monday, March 14, 2011

Oatmeal

Oatmeal was the ingredient of the week for Ana and I. At first I was feeling for oatmeal cookies, but then I found an oatmeal bar recipe on Canadianfamily.ca. This recipe has a different twist than the typical oatmeal bar/granola by using maple syrup, orange zest and cinnamon. The good thing about these bars is that they taste amazing. They are way better and "healthier" (as in less fattening) than store bought granola bars, but the bad thing is that they are quite addictive, I simply can't eat just one.

This recipe is made for a 9-inch square pan, which I currently do not have, so in order to accommodate my pan, which is 13 X 9 inches I increased the recipe by half, so if instead of 1/2 cup of sugar I used 3/4 cup. Knowing how much of a klutz I am, I wrote down the revised ingredients before I started and made sure I had enough ingredients, and it turned out well.

-Ann

Awesome Oatmeal Bars
1/2 cup butter
1/2 cup maple syrup
1/4 cup packed brown sugar
2 1/2 cups rolled oats (not quick, instant, or 1 minute oatmeal)
1/2 cup wheat germ or bran (I used bran)
2 teaspoons vanilla
1 teaspoon finely grated orange peel
1 teaspoon cinnamon
1/4 teaspoon salt
1/3 cup dried fruit (I used raisins)

Directions

1. Preheat oven to 325F (160C). Line a 9-inch (2.5L) square baking pan with parchment paper, leaving a 1-inch overhang on 2 sides so you can easily lift the baked bars out.

2. In a large pan heat butter, maple syrup and sugar over medium heat, stirring occasionally. Boil for 1 minute; remove saucepan from heat. Stir in oats, wheat germ/bran, vanilla, orange, cinnamon, and salt until well combined. Stir in dried fruit.

3. Spread mixture evenly in pan, pressing down firmly using base of measuring cup. Bake for 30-35 minutes, until a deep golden colour. Cool completely in pan or wire rack. Once cooled, use parchment to lift to a cutting board; cut into bars with a large serrated knife. 

------------------------------~.~.~.~.~.~.~.~.~.~.~.~.~----------------------------

My plan was to make Apple Oatmeal Cake for this week and I did. But it was a disaster. =( I don't know what happened, maybe the flour listed wasn't enough, maybe I did something wrong, I don't know. All I know is that I had to come up with a plan B, which fortunately I already had. And what a delicious plan B it was. Oh, and healthy, too - oatmeal, bananas and nuts, that's healthy, isn't it?

I tried this recipe a long time ago, when I was still living in Toronto so Ann had the chance to try this cookies., too. She liked them as much aas I did. I think she even asked for the recipe, which I forgot to give her. So hey Ann, here's the recipe for you! Sorry for the (long) delay!

Just a note: these aren't crunchy nor chewy cookies. They are cake-y cookies. Delicious cake-y, soft, taste-like-this-muffins cookies. So good! To make it even better, this cookies don't require a mixer, just one bowl and a wooden spoon. =)

-Ana

Banana Oatmeal Cookies
From here
3/4 cup oatmeal
3/4 cup sugar
1/4 cup milk
1/2 teaspoon salt
1 teaspoon ground cinnamon
1/2 cup hazelnuts, chopped
3/4 cup vegetable oil
1 egg
1 teaspoon baking soda
1 teaspoon nutmeg (omitted)
2 ripe bananas
1 1/2 cups flour
Chocolate chips - optional

1. Preheat oven to 350F.

2. Combine ingredients in order listed. It will be runny but that`s okay.

3. Drop tablespoonfuls  onto a greased baking sheet - I didn't greased mine and it was fine. Make sure to leave some space between the cookies because they will spread.

4. Bake for 10-15 minutes, depending on size of cookies, or until the edges are browned. Mine took 15 min. Be careful to not overbake.