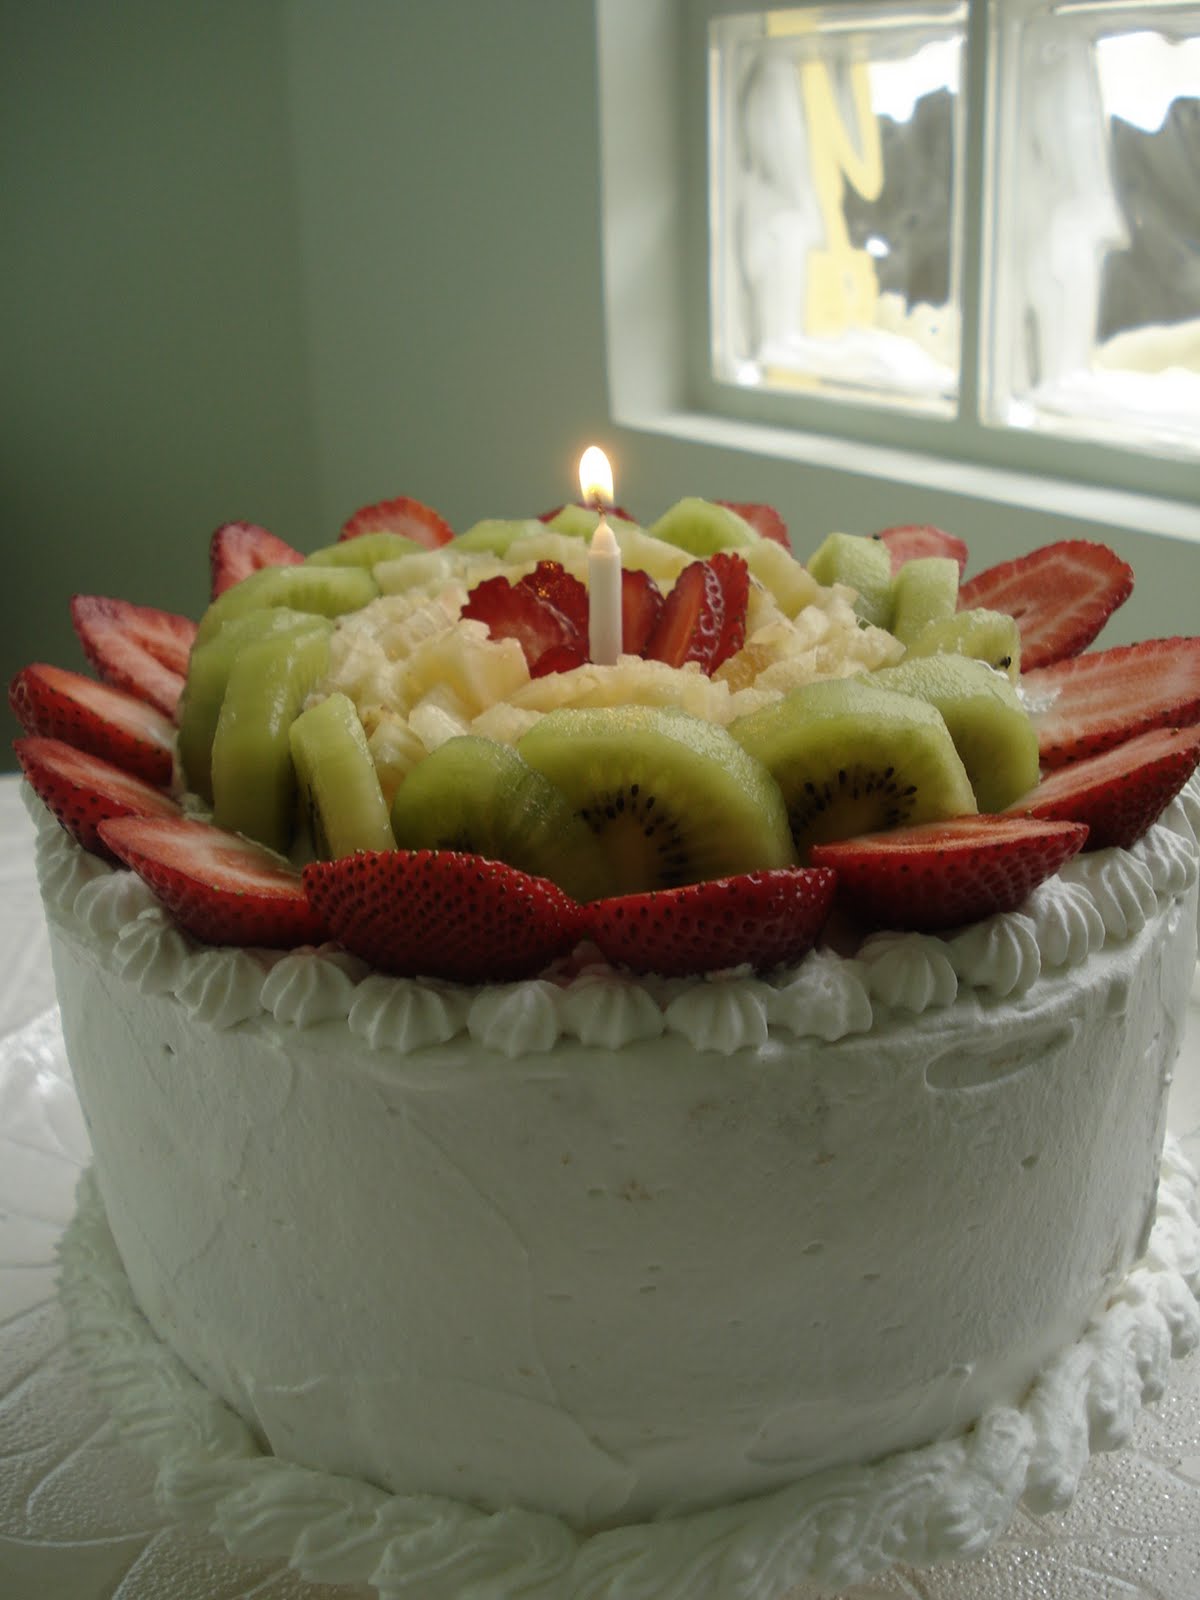
Wednesday, September 19, 2012

Coconut Cake with Lemon Syrup

Wow, it's be ages since I've posted on blogger!  The user account has changed-but I like it!  I have no excuse for not posting on blogger.  I'm still baking but unfortunately I've gotten lazy in posting them.

The reason why I've suddenly resurfaced is that this next recipe is for a little assignment I have to do in my of my classes.  Many of us get stressed from the daily grind within our lives, and it's important to give ourselves a little bit of love in the form of self care.  Self care is doing something for you, whether it's physical like bike riding; relaxing like meditating; or in my case baking, which can be messy, but fun, you just have to take some "me time" once in a while.

With that being said, I decided to make a Coconut Cake with Lemon Syrup, taken from Donna Hay's book Modern Classics, Book 2.  I have to admit that my motivation in baking this particular cake was the photo in the book.  The cake looked beautiful drizzled with lemon syrup, garnished with what looked to be crystallized lemon peels on top.  Unfortunately my cake didn't look nearly as good as Donna Hey's version, but coconut and lemon is a great combination.  Happy Baking! 

~Ann

Coconut Cake with Lemon Syrup


125g (4oz) butter, softened
2 teaspoons finely grated lemon rind
1 cup caster (superfine) sugar (I used granulated sugar)
4 eggs
2 cups desiccated coconut
1 cup plain (all-purpose) flour, sifted
1 teaspoon baking powder, sifted

Lemon Syrup
1 cup sugar
1/4 cup (2 fl oz) lemon juice
3/4 cup (6 fl oz) water
1/2 cup shredded lemon rind

Direction

1) Preheat the oven to 160C (325F)
2) Place the butter, lemon rind and sugar in the bowl of an electric mixer and beat until light and creamy. Add the eggs gradually and beat well.
3) Fold through the coconut, flour and baking powder.
4) Pour the mixture into a 20cm (8 in) round cake tin lined with non-stick baking paper and bake for 45 minutes or until cooked when tested with a skewer.

Lemon syrup

1) Place the sugar, lemon juice, water and melon rind in a saucepan over low heat and stir until the sugar is dissolved.
2) Allow to boil for 5-7 minutes or until syrupy.
3) Pour half of the hot syrup over the hot cake in the tin.  Remove the cake from the tin, slice and serve with the remaining syrup and think (double) cream.  Serves 8-10.

Wednesday, July 18, 2012

(Salted) Caramel Chocolate Chip Cookie Bars

Hi, there. Long time no see, eh? Sorry for neglecting the blog for so long. I swear it wasn't on purpose, things just were pre~tty crazy at this side of the world. But before you forget about me, I bring you this sweet treat.  It's pretty darn delicious - not to mention addicting! The original recipe calls for fleur de sel, but I didn't have it on hand so I just ommited it. And it turned out delicious all the same. I added some nuts to give it some crunch. Yum! Next time I'd add more caramel sauce, though 'cause I thought my layer was too thin and I couldn't taste the caramel. These bars are a-ma-zing, I'm salivating just thinking about it. Do me a favor and try it as soon as possible, please! All the changes I've made are in italics.

Hope to see you soon!

~Ana.


Cookie Bars
2 1/8 cups all-purpose flour
1/2 teaspoon baking soda
1/2 teaspoon salt
170g (12 tablespoons) unsalted butter, melted and cooled slightly
1 cup light brown sugar
1/2 cup granulated sugar - used refined sugar
1 large egg
1 large egg yolk
2 teaspoons vanilla extract - used 1 teaspoon vanilla essence
1 1/4 cups chocolate chips
6 tablespoons salted caramel sauce*
fleur de sel, for sprinkling - didn't use
1/4 cup cashew nuts, chopped

*Caramel sauce
Tracey used a home made caramel sauce but I was lazy and melted 140g of caramel candy with 2 tablespoons heavy cream using the microwave.


To make the cookie bars: Preheat oven to 325 F/160ºC with a rack in the lower third. Line an 8x8-inch baking dish with aluminum foil, leaving an overhang on opposite sides to allow you to lift the bars out after baking. Spray the aluminum foil with nonstick cooking spray.

In a medium bowl, whisk the flour, baking soda and salt together. In a second bowl, combine the butter and both sugars, whisking until combined. Add the egg, egg yolk and vanilla and whisk to completely incorporate. Add the dry ingredients to the wet, and use a rubber spatula to fold the dry into the wet just until combined. (The batter will be quite thick.) Use the rubber spatula to fold in the chocolate chips and nuts, if using.

Transfer half of the batter to the prepared pan, pressing it into an even layer in the bottom. Pour the caramel sauce over the cookie dough, leaving just a little space around the edges. Use a small cookie scoop to dollop the remaining cookie dough over the salted caramel. Press down gently with your fingertips to distribute. It's fine if the caramel layer isn't completely covered - it will spread to cover as it bakes. Sprinkle the top with fleur de sel. Bake for 35-40 minutes, or until the bars are golden brown and slightly firm to the touch. The bars will begin to pull away from the sides of the pan when they're done.

Remove the pan to a wire rack. Let the bars cool completely before lifting them out of the pan and cutting into squares to serve.

From here.


Friday, April 27, 2012

Simple Cupcakes

For months my friend V and I have been planning to get together and do some baking. A couple of week ago I suggested that we make cupcakes and she got really excited. She was so enthusiastic about the idea she bought the book 75 Best-Ever Cupcakes by Carol Pastor. As much as we would have liked to make cupcakes decorated with sugar paste and marzipan we wanted to do something simple. So we made Simple Cupcakes, which were pretty simple to decorate. They should have been called Simple Lemon Cupcakes because the icing has a lemony taste to it. V preferred these cupcakes between the two sets that we made (see the Chunky Chocolate and Banana Cupcake entry) because they were fluffy and light. These cupcakes yield 12 but we did 24 mini ones instead.

~Ann

Simple Cupcakes


1 cup self-raising flour
1/2tsp baking powder
1/2 cup butter, softened
1/2 cup caster (superfine) sugar (we used regular granulated sugar)
2 eggs
1 tsp lemon juice
For the lemon icing
1 1/2 cups icing (confectioners') sugar
2 tbsp lemon juice
1 tsp hot water

Directions

1. Preheat the oven to 180C/350F. Line a 12-cup bin tin (muffin tin) with paper cases.
2. Sift the flour with the baking powder and set aside.
3. In a large mixing bowl, beat the butter and sugar together using an electric mixer until light and fluffy.
4. Add the eggs a little at a time, beating the mixture well after each addition. Gently fold in the sifted flour using a metal spoon. Add the lemon juice and stir to blend.
5. Fill the prepared cups half full. Bake for 13-15 minutes until the cakes look golden and the tops spring back when touched. Transfer to a wire rack to cool completely.
6. To make the icing, sift the icing sugar and gradually mix in the lemon juice and water until the mixture is smooth. Spoon a little icing on to each cake and smooth it with a metal spatula.

Chunky Chocolate and Banana Cupcakes

I've got a confession to make: I've never watched the entire movie of The Notebook. It's suppose to be really romantic, and I like romantic movies, but I've just never got around to watching it. My friend V wanted to put an end to this, and came to my place earlier this week for an evening of baking cupcakes and watching The Notebook. We didn't get around to watching the movie but we made a ton of cupcakes. We made two kinds from V's new book 75 Best-Ever Cupcakes by Carol Pastor. The first set we made were Chunky Chocolate and Banana Cupcakes. They were more like Chocolate Chip and Banana Cupcakes, but I thought they came out pretty good. My friend preferred the second set of cupcakes we did, Simple Cupcakes. I'll post that recipe on the next entry. Happy Baking!

~Ann
Chunky Chocolate and Banana Cupcakes


6 tbsp semi-skimmed (low-fat) milk
2 eggs
2/3 cup butter, melted
2 cups plain (all-purpose) flour
1 tsp baking powder
3/4 cup golden caster (superfine) sugar (we used regular granulated sugar)
5oz plain (semisweet) chocolate, cut into chunks (semisweet chocolate chips are fine too)
2 small bananas, mashed

Directions

1. Preheat the oven to 200C/400F. Arrange 12 paper cases in a muffin tin.
2. In a small bowl, whisk the milk, eggs and melted butter together until combined.
3. Sift together the flour and baking powder into a separate bowl. Add the sugar, chocolate and bananas to the flour mixture.
4. Stir gently to combine, gradually stirring in the milk and egg mixture, but do not beat it. Spoon the mixture into the paper cases. Bake for about 20 minutes until the cakes are risen and golden. Allow to stand for 5 minutes, then turn out and leave to cool on a wire rack.
-Makes 12 cupcakes

Sunday, March 25, 2012

Carrot Cake

I've been craving carrot cake for some time now, but I've never gotten around to making it simply because I've been too lazy to actually grate the carrots. I know I'm awful but this week I stopped procrastinating, dug through my cupboards, grabbed my grater and grated those carrots for this cake, and the end results were quite satisfying. I got the recipe from one of my books, Cooking: A Commonsense Guide, edited by Jane Price and Justine Upex. I guess this is the North American/European version of carrot cake because in Brazil it's made differently, where the carrots are pureed rather than grated. The carrot cake turned out pretty good. Changes that I made are in italics. Happy Baking!

~Ann

Carrot Cake

3 Eggs

1 cup (250ml) oil

1 1/4 cups (230g) soft brown sugar (I did not have any brown sugar...well I did but it was completely hard so I used white sugar instead.)

1 1/2 cups self-raising flour

1 teaspoon bicarbonate of soda

pinch of salt

2 teaspoons ground cinnamon

3/4 cup chopped pecans (I used 3/4 cup of raisins instead)

1 2/3 cups grated carrot (I don't know how many carrots this yields, but I would advise you to start with two big carrots. I grated three and it was way too much.)

125 g (4 oz) cream cheese, softened

30 g (1 oz) butter

1 cup icing sugar

2 teaspoons orange juice

Directions

1. Preheat the oven to 180C (350F). Grease a deep 23 cm (9 inch) square cake tin and line the base and sides with baking paper.

2. Combine the eggs, oil and brown sugar in a large bowl. Add the sifted flour, soda, salt and cinnamon, and beat with electric beaters until the mixture is smooth. Add the nuts (or raisins) and carrot and stir well.

3. Pour the mixture into the tin and bake for 45 minutes, or until a skewer comes out clean when inserted into the centre of the cake. Leave for at least 20 minutes before turning out onto a wire rack to cool.

4. To make a cream cheese topping, put the cream cheese, butter, sugar and orange juice in a bowl and beat together until the mixture is spreadable. Spread over the cake and if you would like sprinkle some extra pecans on top.

Wednesday, March 7, 2012

Ovaltine Brownies

Hi, hey, hello, hi there! Remember me? After a looooong vacation from the blog, I'm back. And with a super-duper delicious recipe. =9
Do you like brownies? Do you like Ovaltine? Oh great, than you are going to LOVE today's recipe.
Let's get to business!

~Ana.
Ovaltine Brownies
Slightly adapted from here .


125g dark chocolate, chopped
150g unsalted butter
130g brown sugar
2 eggs
125g all-purpose flour
1/8 teaspoon baking powder
2 1/2 tablespoons unsweetened cocoa powder
75g Ovaltine - the original recipe calls for Horlicks

1. Preheat the oven to 180ºC/350°F. Line a square 8in (20cm) baking pan with foil, leaving a 1in (2.5cm) overhang.
2. Melt butter and chocolate and let it cool a bit.
3. Add sugar and eggs, mixing well.
4. Sift flour, baking powder and cocoa powder over the chocolate mixture, add the Ovaltine and stir until smooth.
5. Pour over the prepared pan and bake for 30 minutes or until just set - be careful to not overbake.
6. Let it cool before cutting it - if you can resist that long. ;)

Serves 16.

Saturday, February 25, 2012

Snickerdoodles

I know, I know, it's been forever since I've posted here. Things have been pretty busy on my side of the world, but I haven't forgotten about OSSD. A couple of weeks ago my mom asked me when I was going to make a ginger cake. I told her I would make one soon, and instead I ended up making snickerdoodles. I have no idea why, but I wanted to bake these instead. So for those who don't know snickerdooles are like butter cookies covered with cinnamon and sugar.
The recipe is taken from Betty Crocker.com. It's a pretty standard recipe. The only change I made is using only butter instead of butter and shortening. Changes and comments are in italics.
The only comments I can make about these cookies, are that they are very sweet. I thought that I had a sweet tooth, but these are way too sweet for me. I would have loved these when I was a kid, when I used to actually eat granulated sugar *shudder*. Another thing is the serving size. On bettycrocker.com it's states that it serves four-I think the author meant 4 dozen because the batter was so much, I froze some to use for another time. With that said, it's great being back, and I hope I can post more in the future. Happy Baking!
~Ann
Snickerdoodles
1 1/2 cups sugar
1/2 cup butter or margarine, softened
1/2 cup shortening (I used 1 cup of butter instead)
2 eggs
2 3/4 cups all purpose or unbleached flour
2 teaspoon cream of tartar (Back in the day, cream of tartar was used as a leavened agent. If you can't find cream of tartar, then use baking powder instead)
1 teaspoon baking soda
1/4 teaspoon salt
1/4 cup sugar
2 teaspoons ground cinnamon
Directions
1. Heat oven to 400F
2. Mix 1 1/2 cups sugar, the butter, shortening and eggs large bowl. Stir in flour, cream of tartar, baking soda, and salt.
3. Shape dough into 1 1/4-inch balls. Mix 1/4 cup sugar and the cinnamon. Rolls balls in cinnamon-sugar mixture. Place 2 inches apart on ungreased cookie sheet.

4. Bake 8 to 10 minutes or until set. Remove from cookie sheet to wire rack.

Monday, December 5, 2011

Happy B-Day B.!!

Last Thursday was lil'sis b-day and off course I made cake. She demanded asked for a Cookies and Cream Cake, so Cookies and Cream Cake it was. And it had to look EXACTLY like this one. Yeah, she's kinda bossy...but it was her birthday so...
I have to admit that she did a great choice, though. This cake is amazing! So moist, and fluffy, and light. Not too sweet, just the way we like it. Perfect. The only change I made was to use whipped cream instead of buttercream. Oh, and I added crushed cookies to the filling. =D

PS.: Dec 1st was Ann's mother's birthday,too, so I'm also dedicating her this cake. Elaine, I hope you had an amazing day and have many more birthdays to come. Happy (belated) Birthday!! =)

~Ana

Cake
1 1/4 cups All-purpose Flour
2/3 cup Dutch-process cocoa powder (or Hershey's Special Dark)
1 1/2 tsp Baking Soda
1/2 tsp Baking Powder
1/2 tsp Salt
3/4 cup Unsalted Butter
1 1/2 cups Sugar
1 tsp Vanilla
3 large Eggs, room temperature
1 1/4 cups Buttermilk

Frosting/Filling
600ml whipping cream
Sugar, to taste
Crushed Oreos - 4-5

For the cake:

1. Preheat oven to 350F/180ºC. Prepare two 8-inch cake pans with butter and flour.
2. Into a medium bowl, sift together flour, cocoa powder, baking soda, baking powder, salt. Set aside.
3. In the bowl of a standing mixer, or a large bowl using a hand held mixer, beat together the butter, sugar, and vanilla until light and fluffy. About 3 minutes. Add the eggs one at a time, beating until incorporated and scraping down sides as needed.
4. With mixer on low speed, add 1/3 of the dry ingredients, mix until incorporated. Then add 1/2 of the buttermilk, mix until incorporated. Repeat until the last 1/3 of flour has been used. Mix until incorporated and then beat for 1 additional minute. Batter might look curdled but it's okay.
5. Divide the batter evenly between the two prepared pans. Bake for 35-40 minutes, or until a toothpick inserted into the center comes out clean and the sides begin to pull away from the edges. Allow to cool in the pan on a wire rack for 10 minutes. Turn the cakes out onto the racks and allow the cakes to cool completely. I used just one 9-inch cake pan and baked for aprox. 1 hour.


For the filling:
1. Beat  2/3 of the whipping cream and sugar until soft peaks form. 
2. Fold in crushed Oreos.

For the frosting:
1. Beat remaining whipping cream - with sugar to taste- until stiff peaks form.


Cake Assembly:
1. When the cakes are completely cool, cut each cake in half  horizontally. Use 1/3-1/2 cup of frosting to fill between each layer. When all the layers are stacked, set aside 1/2 cup of frosting then use rest to frost the outside.*
2. Using a ziploc bag and a rolling pin, crush all but 7 of the Oreo cookies. Apply the cookie crumbs to the sides of the cake*
3. Use the reserved 1/2 cup of frosting to create 7 swirls on the top of the cake, place a cookie in each swirl.


*I assembled the cake inside the cake pan and left covered with foil overnight in the fridge. Next day, I used a foam plate, smaller than the cake pan, as a base - you can use a cardboard wrapped in plastic wrap; inverted the cake, frosted with whipped cream - spreading a thick layer on top.
Now comes the hard part: using a spatula, try to lift the cake, together with the cardboard, and slide it into your palm. Be careful not to lift too much or the cake will tumble. Follow step 2. I find it easier and less messy to do this step with a rectangle pan or parchment paper underneath, or else you will end up with cookie crumbs all over your kitchen. Set on a nice cake plate. 


Recipe taken from Sunny Side Up in San Diego, that adapted from Family Circle Magazine, February 2009.

=B

Sunday, November 20, 2011

Chocolate Marble Cake

I have quite a collection of baking pans and tools, however, as much as I like baking cakes I do not own a pair of round 8 inch cake pan nor a springform pan, which are essential pans for cakes. I keep promising myself that I will buy a set of cake pans, but because I am a professional procrastinator, I never get around to it. Hence this week, I am adding another quick bread/cake recipe, a chocolate marble bread, taken from Joy of Baking.com.

The writer stresses the importance in using real vanilla extract in vanilla based recipes, rather than imitation vanilla which leaves a bitter aftertaste. I have to admit that this is the first time I've used vanilla extract in a recipe on OSSD, and I could definitely taste the difference between real and imitation vanilla.

When making the marble bread, I remembered Ana's attempt at making a marble cake a while ago which did not have the swirls that she wanted. I was kind of worried that mine would turn into a mess as well, but I wanted to take on the challenge, and it didn't turn out so bad for my first marble cake ever. The only thing I screwed up on was not dividing the batter 50/50 so there was more chocolate than vanilla batter, but other than that, it turned out pretty good.

~Ann

Chocolate Marble Cake*

4 ounces (115 grams) semisweet or bittersweet chocolate, chopped (I used bittersweet chocolate chips)

1/2 cup (120 ml) milk, divided

1 1/2 cups (195 grams) all purpose flour

2 teaspoon baking powder

1/4 teaspoon salt

1/4 cup (60ml) sour cream or plain yogurt

1/2 cup (113 grams) unsalted butter, room temperature

3/4 cup plus 2 tablespoons (170 grams)granulated white sugar

2 large eggs

1 teaspoon pure vanilla extract

Direction

1. Preheat the oven to 325F degrees and place rack in the center of the oven. Butter and lightly flour a 9 X 5 X 3 inch loaf pan. Line the bottom of the pan with parchment paper.

2. Melt the chocolate, along with 1/4 cup of the milk, in a stainless steel bowl that has been placed over a saucepan of simmering(Not boiling!)water. Remove from heat and set aside.

3. In a small bowl whisk the sour cream with the remaining 1/4 cup milk, and the vanilla extract.

4. With an electric mixer, beat the butter and sugar until light and fluffy. Beat in the eggs, one at a time, until well combined. Scrape down the sides of the bowl as needed. With the mixer on low speed, alternately add the flour mixture and sour cream/milk mixture, in three additions, beginning and ending with the flour. Spoon half of the batter into a separate bowl. Add the melted chocolate mixture to one half of the batter and fold in.

5. With two spoons, place spoonfuls of the two mixtures into the prepared loaf pan alternately (chocolate, white, chocolate, etc.) Run a wooden skewer or knife through the two batters to achieve a marbled effect. (Be careful not to over mix or you won't get the marble effect.) Bake in preheated oven for about 50-55 minutes or until a toothpick inserted in the center comes out clean.

6.Remove from oven and place on wire rack to cool for 10 minutes before removing from pan. Cool completely.

Makes 1 loaf

*Recipe taken from Baking with Passion by Dan Lepard and Richard Whittington

Tuesday, November 8, 2011

Today is a special day!

Happy Birthday Ann!!!
I can't believe another year has passed since we last celebrated your birthday...Time really flies. I wish I could be there to celebrate with you again this year. =( But since I can't, I'll leave a special message for you.


I wish you all the best in the world! And may all your dreams come true and all your goals be achieved.You are a great friend and a great person. I'm glad I had the chance to meet you.  I love ya and miss ya! Sometimes life can be hard but know that something awesome is in store for you. =) Don't ever give up. Keep strong, with a smile on your face and positive thinking. And when things get tough remember: breath in...and out, in....and.... hehe.

I hope you have a great day! Oh, and have cake! (I would sugest Dimitri's huge waffles and/or cakes ;))

~Ana.


PS: I hope you liked the cake. I know we did. ;)
PPS: No recipe today, guys. Sorry. Busy with final terms...=(

Thursday, October 27, 2011

Low Fat Bran Muffins

I have a confession to make: I love bran. I love bran cereal, bran muffins, bran bread, granola bars made with bran, etc. Hence this week I made a batch of Low Fat Bran Muffins for my family and me. I got this recipe from I Love Muffins.ca. So if you are looking for a sweet but "healthier" breakfast option, try this out.

~Ann

Low Fat Bran Muffins

1 1/2 cup wheat bran

1 cup low-fat milk

1/2 cup unsweetened applesauce

1/2 banana-mashed

2/3 cup brown sugar

1/2 teaspoon vanilla

1/2 cup white flour

1/2 cup whole wheat flour

1 teaspoon baking soda

1 teaspoon baking powder

1/2 teaspoon salt

1 cup raisins or blueberries or dried cranberries (I omitted the fruit)

Directions

1. Preheat oven to 375F and line muffin tins with paper liners or grease well.

2. Mix togher wheat bran and milk and let stand for about 10 minutes.

3. In a large bowl, mix together aplesauce, banana, brown sugar and vanilla. Add to the bran and milk mixture. Stir in the flour, baking soda, baking powder and salt.

4. Gently fold in raisins (or other dried fruits.)

5. Fill muffin tins almost to the top and bake for 15-20 minutes.

Saturday, October 15, 2011

Lime Cake

Hey guys! Today I bring you this simple yet delicious Lime Cake. My sister made it a while ago and it was a huge success so I decide to share it with you. =) So light, fluffy, moist, and tangy. Yum! And the process couldn't be easier - and faster: just blend and mix. Simple as that. Perfect for any time of day - and night. ;)
Sorry for the short post. My inspiration is on vacations today. Hahaha.

~Ana.


Cake
1 cup vegetable oil
1 cup milk, room temperature
4 eggs
Zest and juice of 1 lime
2 cups sugar
Pich of salt
3 cups all-purpose flour, sifted
1 tablespoon baking powder

Frosting
1 can sweet condensed milk
5 tablespoons butter, room temperature (~100g)
1/3 cup lime juice

Start with the frosting
1. Mix all the ingredients with a wooden spoon - a mixer would be fine, too - until smooth.
2. Put in the fridge until it thickens. I recommend making only half the batch.

For the cake
1.Put oil, milk, eggs, lime juice, sugar, and salt in a blender and blend until smooth.
2.Transfer into a large bowl and mix in the flour, baking powder, and lime zest.
3. Pour into a lined rectangular (25x35cm) baking pan and bake for 40 minutes in a preheated oven (180ºC).
4. Do the cake test. Let it cool before frosting. Decorate with lime zest.
5. Serve it cool or at room temperature.


Sunday, October 2, 2011

Fruit Tea Loaf

A few days ago my mother was in the mood for some cake, so I flipped through Cakes Galore (a gift from Ana) and decided upon baking Fruit Tea Loaf. My mother loves fruit cakes and adding tea was unsual, but I was curious to see how it would turn out. To my surprise the cake took two days to make. It is not difficult at all for on day one you mix the fruits, spices and liquid together and store it overnight for the contents to saturate. Day two you add the flour and dump the batter into a bread pan-easy! My mother liked the cake, however my only reservation was that it looked nothing like the cake in the book. Now I know the cooking or baking results won't replicate the exact image in cookbooks, but my cake was really, really ugly. I will make another fruit cake for the holiday season, but probably not this one.

~Ann

Fruit Tea Loaf

2 Cups mixed dried fruit, such as golden raisins, currants, raisins, and canded cherries

Generous 1/2 cup light brown sugar

2/3 cup brewed tea (the author suggests using Earl or Lady Grey tea for a scented flavour, I used Earl Grey)

2 teaspoons ground allspice

Finely grated zest of 1 orange (I used 1 lemon instead)

1 Tablespoon clear honey, warmed

Directions

1. Place the mixed dried fruit, sugar, butter, tea, and allspice in a saucepan. Cover and heat gently until the butter has melted, stirring occasionally. Bring to the boil and boil for 1 minute, then remove the pan from the heat. Add the orange zest, then set aside and leave overnight.

2. Preheat the oven to 350F. Grease and line a 8 1/2 inch loaf tin.

3. Fold the sifted flour into the fruit mixture. Spoon the mixture into the prepared pan and smooth the surface. Bake in the oven for 50-55 minutes, or until golden brown and a skewer inserted into the center comes out clean.

4. Remove the cake from the oven, brush the top of the cake with wamred honey, then leave it to cool completely in the pan. Turn out and serve in slices spread with butter, if you like.

Friday, September 16, 2011

Banana Hazelnut Dessert Wontons

Flipping through the newspaper 24H, I came across a deliciously looking recipe called Banana Hazelnut Dessert Wontons. It is an easy and quick recipe to follow with a baking time of only 5 minutes. After making a batch of these, I have to admit that they were not my favourite. I thought the banana and Nutella would have made these wontons amazing, but my taste buds were not feeling it. I will post the recipe anyway, and if you have the ingredients, you can try it out for yourself and see what you think.

~Ann

Banana Hazelnut Dessert Wontons

1 medium banana peeled and diced

1/4 cup chopped pecans

1/4 cup brown sugar

16-20 wonton wrappers

1 egg lightly beaten

1/3 cup hazelnut spread

Powdered sugar

Directions

1. Preheat the oven to 400F (200C). Stir together banana, pecans, and brown sugar in a small bowl.

2. Lightly brush the edges of each wonton wrapper with beaten egg. Spoon about 1 teaspoon of hazelnut spread and 1-1/2 teaspoons banana mixture in centre of each wonton.

3. Fold over each wrapper, forming a triangle and seal edges well. (Instead of folding each wonton, I covered the banana and hazelnut wonton with an extra wrapper and sealed the edges, making a square shape)

4. Place wontons on baking sheet sprayed with nonstick cooking spray. Brush the tops of the wontons lightly with lightly beaten egg.

5. Bake 5-6 minutes or until lightly brown. Cool slightly and sprinkle with powdered sugar.

Wednesday, September 7, 2011

Whole Wheat Banana Bread

Hey hey hey, let's bake a cake! Again. But cake's always good. ;)
Besides, this banana bread is super good for you. It's made with whole wheat flour (fiber), nuts (antioxidant) bananas (potassium) and coconut (er..hm..fiber?). See? All good stuff. =)
This is the best banana bread I've had so far. Seriously. It is at the top of my banana bread list. Go make some for you! ;)


3 cups whole wheat flour - I used 2 c. whole wheat and 1 c. all-purpose and worked out fine
1 teaspoon baking soda
3/4 teaspoon salt
3 large eggs
2 cups brown sugar - I used 3/4 c brown sugar and 3/4 caster sugar
1 cup vegetable oil
1 tablespoon vanilla extract - I used 1 teaspoon vanilla essence
1 tablespoon banana extract - I ommited
1 1/2 cups very ripped bananas, mashed (about 3 bananas)
1 cup shredded coconut
1 cup pecans, toasted and chopped - I used Brazil nuts
1/2 cup buttermilk

1. Preheat oven to 350ºF/180ºC. Grease the pan with butter.
2. In a small bowl, sift the flour, baking soda, and salt. In another large bowl, whisk the eggs, oil, and sugar. Add the flour mixture to the eggs mixture, mixing with a spoon/spatula.
3. Add vanilla and banana extracts, mashed bananas, coconut, nuts and the buttermilk, mixing until incorporated.
4. Pour into the pan and bake for 60-65 minutes. Let it cool for about 10 minutes before removing from the pan.

PS.: I poured half the batter into the pan, arranged some banana slices over it and topped with the rest of the batter.

Recipe taken from here (in Portuguese).


Friday, September 2, 2011

Pineapple Upside-Down Cake

A few week ago I received an email from Ana informing me that in August our blog Oh So Sinfully Delicious would be a year old. I was totally taken by surprise. I couldn't believe that a year has gone by so quickly. Contributing to this blog has been a great experience for me. I got to learn so much about baking, photography, and blogging, and even though I have not contributed much for the past few months, I am keen on baking and doing more food writing.

A few months ago I purchased Cooking: A Commonsense Guide, ed: Jane Price, and Justine Upex. It's a cookbook for people who can't cook or have little experience in the kitchen. What I like about this book is, it breaks down cooking into introducing different elements, from various pots and pans that are needed, to the different cuts of meats, poultry, and seafood so when one is faced with a recipe it's not as intimidating as one may suspect.

From Cooking, I baked a Pineapple Upside-Down Cake. Traditionally this cake is topped with whole pineapple slices garnished with maraschino cherries, but this recipe omits the cherries and slices the pineapples in half. It's a different design but tastes just as good.

~Ann

Pineapple Upside-Down Cake

20g (3/4 oz) butter, melted

2 tablespoons soft brown sugar

440g (14 oz can pineapple slices in natural juice

90g (3oz) butter

1/2 cup (125g/4oz) caster sugar (I used granulated sugar)

2 eggs, lightly beaten

1 teaspoon vanilla essence

1 cup (125g/4 oz) self-raising flour

Directions

1. Preheat the oven to moderate 180C (350F). Grease a 20 cm (8 inch) ring tin. Pour the melted butter into the tin and tip to coat the base evenly. Sprinkle the brown sugar over the butter. Drain the pineapple, reserving 1/3 cup (80 ml) of the juice. Cut the pineapple pieces into halves and arrange over the brown sugar.

2. Using electric beaters, beat the butter and sugar in a small bowl until light and creamy. Add the eggs gradually, beating well after each addition. Beat in the vanilla essence.

3. Transfer the mixture to a large bowl. Using a metal spoon, fold in the flour alternatively with the reserve pineapple juice.

4. Spoon the mixture evenly over the pineapple and smooth the surface. Bake for 35-40 minutes, or until a skewer comes out clean when inserted into the centre. Leave in the tin for 10 minutes, then cool on a wire rack.

Thursday, August 25, 2011

1st year celebration cake!

Wow! Time flies, doesn't it? Can you believe it's been a year since we started this blog (well, a year and almost a month now...oops!)?
So, to celebrate the first year of OSSD I made... surprise... surprise... cake! It's very similar to the Mother's day cake I've posted a while ago. The only difference is that I added a thin layer of  sweetened condensed milk and lime mixture (recipe below) before spreading the whipped cream and strawberries, just to give a little tanginess. I also frosted the cake with whipped cream and put mixed fruit on top. The final result: Oh so sinfully delicious! =D


For the cake recipe and how to assemble the cake, click here.

Lime filling:
1/2 can sweetened condensed milk
Juice of 1 lime - or as much or as little as you want.

Mix with a spoon or a fork the condensed milk and juice. Let it sit for 5 minutes to thicken.


Saturday, July 23, 2011

Coconut Cream Pie

This coconut pie is so good we've made it several times now. Just remembering it makes my mouth water. Seriously. I won't say this is the best coconut pie I've ever had, but it's very, very close. And it's perfect  for you folks enjoying summer because is a no-bake, super fast dessert. =)
I'm off to enjoy the cold weather. Brrr. Have a great weekend!


200g Maria type cookies
100g (7 tablespoons) butter, softened

1/2 can sweetened condensed milk
320ml (1 1/3 cup) milk - used wholemilk
2 tablespoons cornstarch
3 eggyolks
100g shredded coconut
1 cup whipping cream

1. Start toasting the coconut. Preheat oven to 375ºF/ 190ºC. Spread coconut evenly in a baking sheet. Put in the oven and, this is super important, keep an eye on it at all times! It can go from golden to black in seconds. 10 minutes should be enough, but it'll depend on your oven. Stir every 5 minutes to make sure all sides are browned evenly. It's ready when golden brown. Let it cool.
2. Finelly crush the Maria cookies in a food processor, or in a blender. Transfer to a bowl and add the butter. Mix with your fingertips untill all the butter is combined. 
3. Transfer to a 8-inch springform pan or pie dish and press evenly into the bottom and sides. Keep aside, or in the fridge if you want.
4. Make the filling: Combine condensed milk, milk and cornstarch in a heavy-bottomed pan. Whisk until the cornstarch is dissolved.
5. Put a sift over the pan and strain the eggyolks. Put over medium heat whisking constantly until it thickens.
6. Pour over pie crust and let it cool completely.
7. Whip the cream to stiff peaks. Spread over coconut cream and sprinkle with toasted coconut.

Adapted from here (In Portuguese).

Wednesday, July 13, 2011

Super Fluffy Pancakes

This is my favorite pancake recipe. I lost count on how many times I've made them since Ann gave it to me last year. More than I should have, I guess. But what can I do, they are that good. Seriously. You should try it this weekend. Or tomorrow for breakfast, why not? They take no time to make and they freeze well, too. That way you can have pancakes for breakfast whenever you want! Do it, do it now!


2 cups all-purpose flour
3 teaspoons baking powder
1/2 teaspoon salt
1/2 cup sugar
1 cup milk, room temperature
4 tablespoons unsalted butter, melted
2 eggs

1. Sift together flour, baking powder, salt, and sugar in a large bowl.
2. Add milk, butter, and eggs and whisk until incorporated.
3. Heat a butter-greased frying pan over medium heat and pour the desired ammount of batter.
4. Brown both sides.
5. Serve with fresh fruits and syrup.

Notes:
-Let the pancakes cool before freezing, rolled in foil or in a tightly sealed plastic bag.
-Defrost in microwave, without foil, for aprox. 1 minute.

~7-8 pancakes.
Unfortunately, Ann forgot where she took this recipe from.

Monday, June 27, 2011

Strawberry Frozen Yogurt

As promised on my last post, here's a refreshing, delicious summer recipe for you. This frozen yogurt is soooooo good, you have no idea. And is super easy, requires no ice-cream maker and no more than 3 ingredients - 4 if you count the salt, but everybody has is at home, right? And what is best, you can finish those strawberries you can no longer eat 'cause you were greedy and bought 4 packs last week. Don't worry, I'm not judging you. If I lived in a country with suculent, sweet and huge strawberries, I would buy tons of it whenever I could, too. ;)


400g plain yogurt
200g sweet condensed milk (1/2 can)
Pinch of salt
~250g fresh strawberries

1. Place strawberries into a blender or food processor and process until they are pureed. Pass through a fine sieve and measure 1/3 cup (75ml). You can keep the remaining puree for another batch.
2. In a metalic bowl, whisk together all ingredients until combined. Place in the freezer and whisk every 30 minutes, for 2 hours.
3. Let it freeze for another 2 hours. Take out from the freezer and let it stand for 10-15 minutes to soften. Mix with a hand mixer until smooth (this step is optional). Return to freezer until it sets.

Recipe adapted from the Passion fruit froyo from this blog. (In portuguese)