Monday, June 27, 2011

Strawberry Frozen Yogurt

As promised on my last post, here's a refreshing, delicious summer recipe for you. This frozen yogurt is soooooo good, you have no idea. And is super easy, requires no ice-cream maker and no more than 3 ingredients - 4 if you count the salt, but everybody has is at home, right? And what is best, you can finish those strawberries you can no longer eat 'cause you were greedy and bought 4 packs last week. Don't worry, I'm not judging you. If I lived in a country with suculent, sweet and huge strawberries, I would buy tons of it whenever I could, too. ;)


400g plain yogurt
200g sweet condensed milk (1/2 can)
Pinch of salt
~250g fresh strawberries

1. Place strawberries into a blender or food processor and process until they are pureed. Pass through a fine sieve and measure 1/3 cup (75ml). You can keep the remaining puree for another batch.
2. In a metalic bowl, whisk together all ingredients until combined. Place in the freezer and whisk every 30 minutes, for 2 hours.
3. Let it freeze for another 2 hours. Take out from the freezer and let it stand for 10-15 minutes to soften. Mix with a hand mixer until smooth (this step is optional). Return to freezer until it sets.

Recipe adapted from the Passion fruit froyo from this blog. (In portuguese)

Wednesday, June 22, 2011

HAPPY BIRTHDAY ANA!
You have been a great friend and an inspiration to me when it comes to exploring and expanding my passion in baking.
Since I cannot be in Brazil to celebrate your birthday (even though I would love to!) I decided to bake something special for you instead. So my gift to you is Red Velvet Cupcakes. I decided to bake these for you for two reasons: 1) The first time I've ever had red velvet cupcakes was in Brazil, and 2) You're a cupcake fanatic.
These cupcakes were awesome-just like you. I love you, and miss you Ana!
With Birthday Hugs and Kisses
-Ann
Red Velvet Cupcakes*
2 1/2 cups sifted cake flour
1 teaspoon baking powder
1 teaspoon salt
2 tablespoons unsweetened cocoa powder
2 oz. red food coloring (two bottles)
1/2 cup unsalted butter, softened
1 1/2 cups sugar
2 eggs, at room temperature
1 teaspoon vanilla extract
1 cup buttermilk, at room temperature
1 teaspoon white vinegar
1 teaspoon baking soda

Directions
1. Preheat oven to 350 degrees. Line two 12 cup muffin tins with cupcake liners.
2. Sift together the cake flour, baking powder, and salt in a medium bowl and set aside. In a smaller bowl, mix food colour, and cocoa powder to form a thin paste without lumps and set aside.
3. In a large bowl, using a hand mixer, beat butter and sugar together until fluffy. Beat in eggs one at a time, then beat in vanilla and the red cocoa paste, scraping down the bowl with a spatula as you go.
4. Add 1/3 of the flour mixture to the butter mixture, mix, then beat in 1/2 of the buttermilk.
5. Beat in another 1/3 of the flour mixture, then add the second 1/2 of the buttermilk. Add the last 1/3 of the flour mixture, and mix until well combined, making sure to scrape down the sides with a spatula.
6. In a small bowl, mix vinegar and baking soda. Add vinegar mixture to the cake batter and stir well to combine.
7. Fill cupcake cups with cake batter untill they are a little under 3/4 full.
8. Place muffin tins in preheated oven. Bake for approximately 20 minutes, rotating pans halfway through.
9. Cool for ten minutes, and frost and decorate the the tops.
*This fabulous recipe was taken from bestcupcakerecipes.blogspot.com

Saturday, June 11, 2011

Orange Poppy seed Muffins

Hi, all!I'm back and I brought you some muffins. =) I know you're all enjoying the sun and beautiful sunny days, and all you want is a cold refreshing treat. But I'll leave that for my next post, okay? It's getting colder and colder - brrr- around here and all we want is a right-out-of-the-oven treat with a hot beverage. ;)


Adapted from this book
300g self-rising flour
1/4 teaspoon baking powder
125g caster sugar
2 tablespoons orange zest
185ml buttermilk
1 teaspoon vanilla
2 eggs, ligtly beaten
110g unsalted butter, melted
Poppy seeds - I didn't measure it but I think 2 to 3 tablespoons should be enough.

1. Preheat oven to 200ºC/390ºF. Line a muffin tray with paper liners.
2. In a large bowl, sift together  flour, baking powder, poppyseeds, and sugar. Add the orange zest and make a well in the center.
3. In a small bowl, mix together buttermilk, eggs, and vanilla.
4. Pour the buttermilk mixture and the melted butter into the flour mix and stir with a fork/whisk jut until combined. Do not overmix - a few flour lumps is ok.
4. Fill the muffin cups and bake for about 12 minutes, or until a skewer comes out clean. Let it cool  for 5 minutes before removing from pan.

Makes 12 muffins.

Tuesday, May 17, 2011

Apple Cake (w/ skin)

Today I bring you another cake, not a fancy, layered cake, but a humble yet delicious apple cake. Perfect for  a chilly afternoon snack along with a cup of tea. =)
What I like the most about this cake is that there's no waste since you use the whole apple - well, except for the seeds, but you can keep them and plant an apple tree. Who knows, maybe oneday you'll be making this apple cake with your own apples. ;) Haha.
Bake on, people!

-Ana
Apple Cake (with skin)

I took this recipe from a brazilian website but I can't find it anymore. =s

1 cup vegetable oil
4 eggs
1 1/2 cups caster sugar
3 apples - I used Fuji apples
2 1/2 cups all-purpose flour
1 tablespoon baking powder
Ground cinnamon, to taste - I used 1 teaspoon
1/2 cup raisins - optional
You can also add nuts, like hazelnuts or cashew nuts

1. Preheat oven to 350ºF/180ºC. Grease and flour a cake pan.
1. Peel the apples and save the skins. Chop the apples into cubes.
2. In a blender, add the oil, eggs, sugar and apple skins and blend until smooth.
3. In a medium/large bowl, sift together flour, baking powder and cinnamon. Add the wet ingredients and mix well. Add the chopped apples, raisins, and nuts and mix.
4. Bake for 40-50 minutes or until a toothpick inserted in the centre of the cake comes out clean. Let it cool for 15-20 minutes in the pan.

Thursday, May 5, 2011

Mother's Day Cake

Hey, everybody! I'm back! These past few weeks have been a litlle busy around this part of the world. Lots of studying and paperworks to do. *sigh* Things are not quite back to normal yet - and I think they won't be 'til the end of June (end of the semester, yay!)- but I wanted to leave a special post for Mother's Day which is right around the corner!
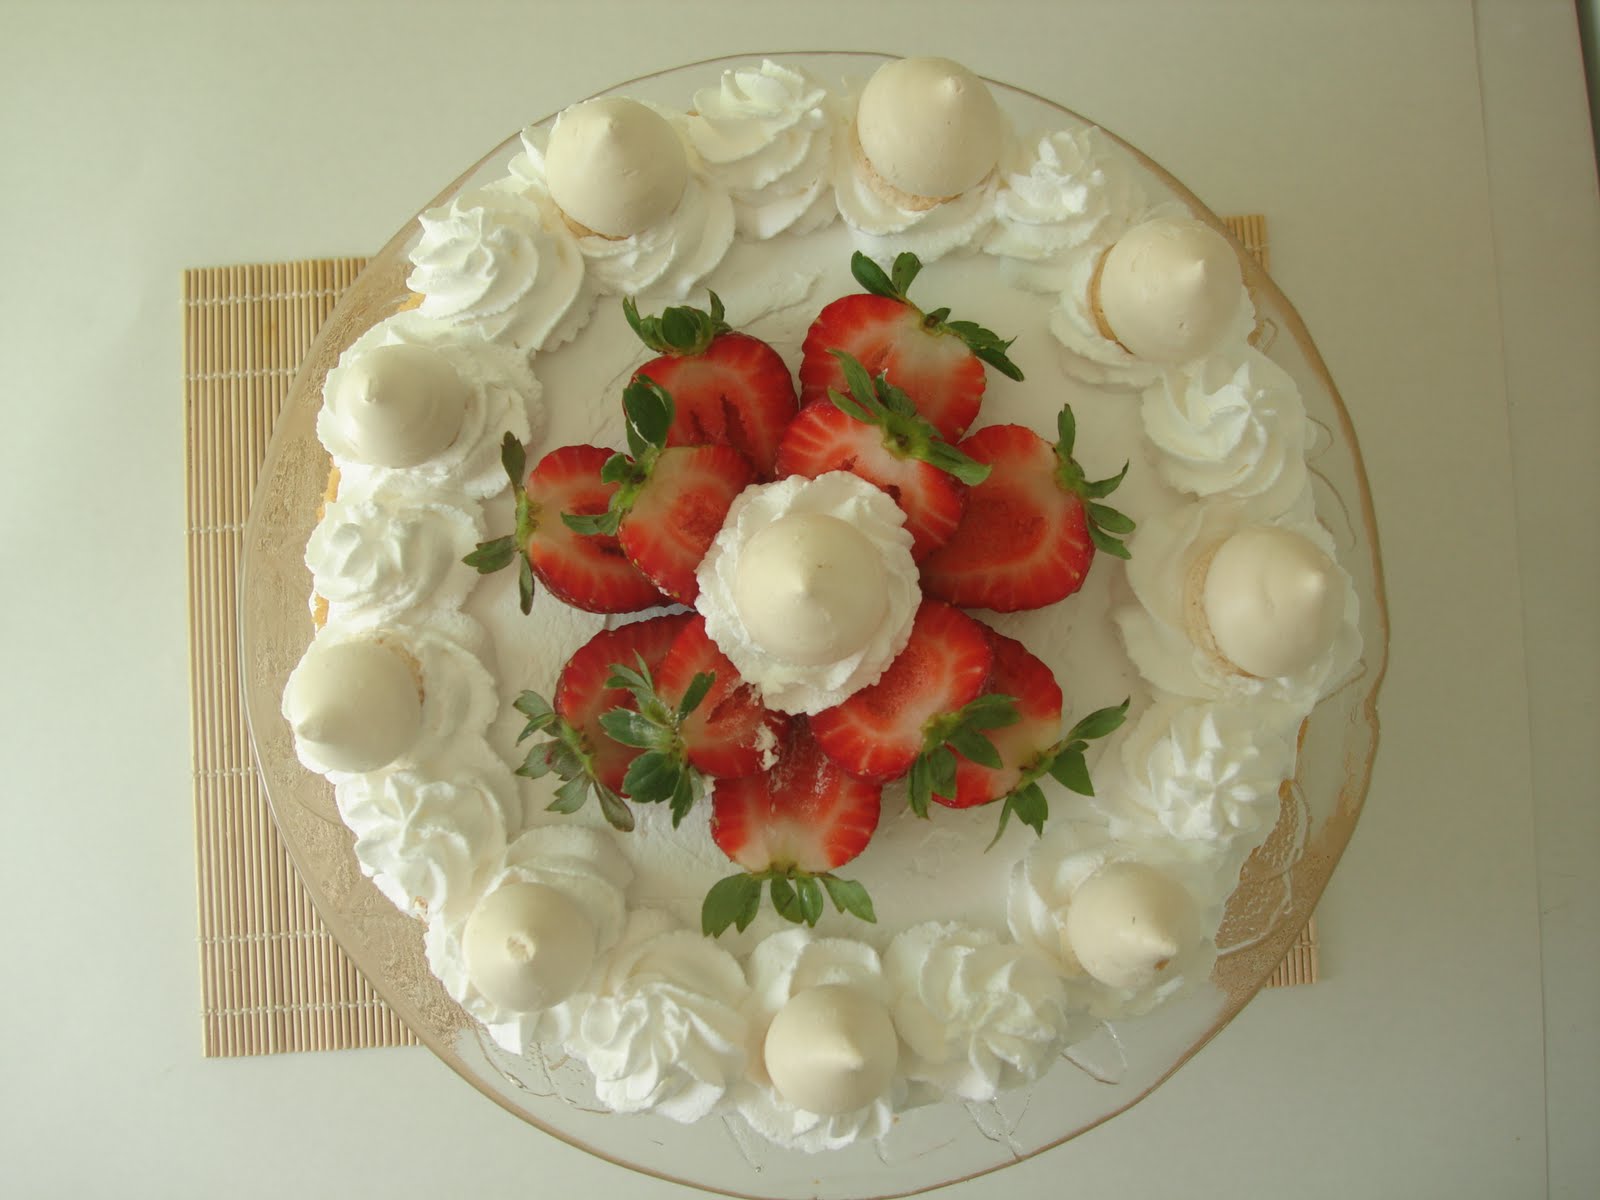
I actually made this cake for my mother's b-day, a couple of weeks ago, and what I really liked about it is the decoration, with the visible layers and the arranged strawberries and meringues on top. Modesty aside, I think this is the prettiest cake I've ever made. =) And it's pretty simple to assemble. I took the idea from here (in Portuguese). Make this cake for your mother, she deserves it! I guarantee she will love it!

To all mother's out there: Happy Mother's Day! Enjoy your so deserved day  and eat cake if you can. =D

-Ana

Strawberry Meringue Cake

You can use your favorite yellow cake recipe. Here's the one I used:
8 egg yolks
1 cup milk, warm
3 cups refined white sugar
4 cups all-purpose flour
1 tablespoon baking powder
8 egg whites

Whipping cream, around 500 ml, beaten.
Around 2 packs of strawberries
Meringues, around 150g.

1. Preheat oven to 350ºF/180ºC. Grease the bottom and sides of a cake pan (sorry, don't know what size I used.) with butter and line the bottom with parchment paper, also greasing it with butter.
2. With a stand mixer, using the whisk attachment, beat egg yolks with milk just until combined. Add the sugar and beat for 20 minutes, over mid-high speed. After the 20 minutes you should be able to draw an 8 with a spoon and it will hold that 8-shape for a few sconds.
3. Using a spatula, fold in the flour and baking powder. I suggest you sift a little bit of the flour over the mixture and fold, repeating until flour is over. Don't forget the baking powder.
4. Beat the egg whites until stiff picks form and fold into the cake batter.
5. Bake until tooth-pick inserted in the centre comes out clean. I forgot to time it but it should take 40 minutes or longer. Just keep an eye on it. Let it cool completely. You can make the cake the day before.
6. Divide the cake in 3. Place the top layer facing down onto a nice cake stand and drizzle with milk, syrup or soda, like Sprite or a similar clear lemon drink (not Coke, please.). Note: If your cake is already moist, skip this step. My cake was more on the dry side.
7. Spread the whipping cream, arrange the strawberries and the meringues. Do not crush your meringues into tiny pieces because they will disspear and you won't taste them after.
8. Place the middle layer on top, drizzle with soda, spread whipping cream, arrange strawberries and meringues. Place the final layer and drizzle again. 
9. Spread a thin layer of whipping cream and decorate as you desire. Keep the cake refrigerated.


Wednesday, April 13, 2011

On Saturday afternoon I decided to make honey waffles for this week's challenge, so I picked a recipe and went to the kitchen. Waffles ready and hot, pictures taken, it was time to taste. It was good, fluffy, thin - blame my regular (not belgian) waffle machine. But it was just good, not delicious or oh-my-goodness-this-is-crazy-awesome, so I chose not to post them for you. I'll be posting some honey recipes I think will make you drool, instead. You're welcome.

How 'bout this Honey Rolls, from The Pastry Affair? Yes, please.


Or these Honey Biscuits from The Average Foodie?


Oh my, I could eat this Honey and Orange Cornmeal Cake for lunch! From Eat Good 4 Life.


Popcorn! Do I need to say more? From Cherry Tea cakes


Now clean the drool from your keyboard and go bake something with honey. It's healthy. ;)

Monday, April 11, 2011

Honey

I don't know what I was thinking when I suggested honey. It was so hard to find a recipe with honey as the main ingredient. I was feeling like making honey buns, but I kept finding honey bun cake, and you know what? Honey bun cake does not contain an ounce of honey-I don't get it. Anyway, from the relatively few recipes that I found online, I chose Old German Honey Cookies from allrecipes.ca. There have been good reviews from people who have baked these cookies, so I decided to try baking these for myself. I had to cut the amount in half because the quantity was enough to feed an army, but these cookies turned out surprisingly well. When I was making the dough, I thought about sprinkling some coarse cane sugar on top to add taste and texture. If delicate had a taste, these German honey cookies would be it. Without the cane sugar, they are light, fluffy, and pair quite perfectly with a warm beverage.

-Ann
Old German Honey Cookies

1 cup white sugar
1 cup shortening
1 cup honey
2 eggs
1 teaspoon vanilla
1 teaspoon baking soda
4 cups all purpose flour
1 teaspoon ground ginger
1/4 cup of coarse sugar (optional)

Directions

1. In a saucepan over low heat, melt together sugar, shortening, and honey. Let it cool.
2. Mix together eggs, vanilla, baking soda, and ginger. Gradually add to cooled honey mixture.
3. Slowly add 4 cups of flour to mixture. Stir until well blended. Drop by teaspoon onto cookie sheets about 2 inches apart.
4. Sprinkle some coarse sugar on top of each cookie. Bake at 350ºF/180ºC until golden (10-12 minutes).