Showing posts with label Lemon. Show all posts

Wednesday, September 19, 2012

Coconut Cake with Lemon Syrup

Wow, it's be ages since I've posted on blogger!  The user account has changed-but I like it!  I have no excuse for not posting on blogger.  I'm still baking but unfortunately I've gotten lazy in posting them.

The reason why I've suddenly resurfaced is that this next recipe is for a little assignment I have to do in my of my classes.  Many of us get stressed from the daily grind within our lives, and it's important to give ourselves a little bit of love in the form of self care.  Self care is doing something for you, whether it's physical like bike riding; relaxing like meditating; or in my case baking, which can be messy, but fun, you just have to take some "me time" once in a while.

With that being said, I decided to make a Coconut Cake with Lemon Syrup, taken from Donna Hay's book Modern Classics, Book 2.  I have to admit that my motivation in baking this particular cake was the photo in the book.  The cake looked beautiful drizzled with lemon syrup, garnished with what looked to be crystallized lemon peels on top.  Unfortunately my cake didn't look nearly as good as Donna Hey's version, but coconut and lemon is a great combination.  Happy Baking! 

~Ann

Coconut Cake with Lemon Syrup


125g (4oz) butter, softened
2 teaspoons finely grated lemon rind
1 cup caster (superfine) sugar (I used granulated sugar)
4 eggs
2 cups desiccated coconut
1 cup plain (all-purpose) flour, sifted
1 teaspoon baking powder, sifted

Lemon Syrup
1 cup sugar
1/4 cup (2 fl oz) lemon juice
3/4 cup (6 fl oz) water
1/2 cup shredded lemon rind

Direction

1) Preheat the oven to 160C (325F)
2) Place the butter, lemon rind and sugar in the bowl of an electric mixer and beat until light and creamy. Add the eggs gradually and beat well.
3) Fold through the coconut, flour and baking powder.
4) Pour the mixture into a 20cm (8 in) round cake tin lined with non-stick baking paper and bake for 45 minutes or until cooked when tested with a skewer.

Lemon syrup

1) Place the sugar, lemon juice, water and melon rind in a saucepan over low heat and stir until the sugar is dissolved.
2) Allow to boil for 5-7 minutes or until syrupy.
3) Pour half of the hot syrup over the hot cake in the tin.  Remove the cake from the tin, slice and serve with the remaining syrup and think (double) cream.  Serves 8-10.

Friday, April 27, 2012

Simple Cupcakes

For months my friend V and I have been planning to get together and do some baking. A couple of week ago I suggested that we make cupcakes and she got really excited. She was so enthusiastic about the idea she bought the book 75 Best-Ever Cupcakes by Carol Pastor. As much as we would have liked to make cupcakes decorated with sugar paste and marzipan we wanted to do something simple. So we made Simple Cupcakes, which were pretty simple to decorate. They should have been called Simple Lemon Cupcakes because the icing has a lemony taste to it. V preferred these cupcakes between the two sets that we made (see the Chunky Chocolate and Banana Cupcake entry) because they were fluffy and light. These cupcakes yield 12 but we did 24 mini ones instead.

~Ann

Simple Cupcakes


1 cup self-raising flour
1/2tsp baking powder
1/2 cup butter, softened
1/2 cup caster (superfine) sugar (we used regular granulated sugar)
2 eggs
1 tsp lemon juice
For the lemon icing
1 1/2 cups icing (confectioners') sugar
2 tbsp lemon juice
1 tsp hot water

Directions

1. Preheat the oven to 180C/350F. Line a 12-cup bin tin (muffin tin) with paper cases.
2. Sift the flour with the baking powder and set aside.
3. In a large mixing bowl, beat the butter and sugar together using an electric mixer until light and fluffy.
4. Add the eggs a little at a time, beating the mixture well after each addition. Gently fold in the sifted flour using a metal spoon. Add the lemon juice and stir to blend.
5. Fill the prepared cups half full. Bake for 13-15 minutes until the cakes look golden and the tops spring back when touched. Transfer to a wire rack to cool completely.
6. To make the icing, sift the icing sugar and gradually mix in the lemon juice and water until the mixture is smooth. Spoon a little icing on to each cake and smooth it with a metal spatula.

Monday, April 4, 2011

Bundt Cake

Things have been pretty crazy on my side of the earth for the past week or so, so making time to bake and blog was difficult, however I as much as I enjoy doing this blog, I did not enjoy making this next recipe which was a sponge cake. It has to be one of the hardest cake I have ever made. Two years ago I bought the summer 2009 Canadian Living Special Cookbook Issue. There was this one recipe that caught my attention which was a Blueberry Citrus Sponge Cake. It sounded delish, and the picture of the cake was mouth watering, so had set aside a steamy summer afternoon to make this cake and the process was not fun. I have eczema, which is a skin problem where I develop rashes all over my hands, and anything acidic that touches my skin burns. Because this is a citrus cake, it requires zesting and squeezing lemons and oranges. I tried to handle the fruits without actually touching the juice, which didn't work. Next, was the separation of eight egg whites, which was really messy, and frustrating since I couldn't separate them. Although the cake did not turn out bad at all, I did not enjoy making this cake at all. You would think that after making this cake two years ago I would change my mind about this cake, or even improve on the baking method, but I haven't on both accounts. When I was making this cake last night, I screamed so much I was afraid the neighbours may have considered calling the police. If separating egg whites is no feat for you, then be brave and try baking this cake. In my opinion it requires a lot of effort, but the results pay off-if you follow the recipe correctly.

  -Ann
Blueberry Citrus Sponge Cake

2 cups sifted cake and pastry flour
2/3 cup granulated sugar
2 teaspoon baking powder
1/4 teaspoon salt
1/2 cup vegetable oil
1 tablespoon grated orange rind
1/3 cup orange juice
2 teaspoon grated lemon rind
2 tablespoon lemon juice
2 teaspoon vanilla
8 egg whites (oh the horror!)
2 cups blueberries (I used one cup, but that's only because I didn't read the instructions properly and I bought enough to make one cup only) Glaze: 1/4 cup granulated sugar
1/4 cup orange juice

Directions
1. In large bowl, whisk together cake and pastry flour, granulated sugar, baking powder and salt.
2. In separate bowl, whisk together oil, orange rind and juice, lemon rind and juice, and vanilla; beat into dry ingredients until smooth and thick.
3. In another bowl, beat egg whites until foamy; beat in icing sugar, 1 tablespoon at a time, until stiff glossy peaks form. Fold 1/3 into batter; fold in remaining whites. Fold in blueberries.
4. Scrape into greased and flour dusted 10-inch (3 L) bundt or tube cake pan. Swirl knife through batter to remove air bubbles.
5. Bake in 350ºF (180ºC) oven until cake tester inserted in centre comes out clean, about 40 minutes. Let cool in pan on rack for 30 minutes.

Glaze
 Meanwhile in small saucepan, bring sugar and juice to boil, stirring; boil for 1 minutes. Let cool. Loosen cake from edges of pan. Invert onto rack; brush with glaze. Let cool.

~Makes 12 servings.

Monday, March 7, 2011

Lemon

On my birthday Ana gave me a cookbook called Cakes Galore by Valerie Barrett. It's a wonderfully little book that contains over 100 cake recipes which are categorized into different themes such as old favourites, kids cakes, desserts, and even "healthy"& special diet cakes. So far I've only made one cake from Cake Galore, the Dark Jamaican Ginger Cake, which was a huge hit among my family so I wanted to try out another cake and selected the Lemon & Ginger Cake. It seems that I have new love for ginger, since I have been baking a lot with it recently, but I was curious to try this recipe out and see how it turned out. To top the cake off I used a lemon glaze which I got from a food blogger also called Valerie @ pixie-baker.blogspot.com.

-Ann

Lemon & Ginger Cake

1 2/3 cups all-purpose flour
1 teaspoon baking powder
1 1/4 cups (2 sticks) unsalted butter, softened
1 cup superfine sugar (regular sugar will do)
3 eggs, beaten
3 tablespoons low fat milk
1/2 cup ground almonds*
1 teaspoon ground ginger (I added an extra 1/2 teaspoon)
2 tablespoon finely grated lemon zest
2 tablespoons finely shredded candied lemon peel (optional, I did not use the candied lemon peel)

*Ground almonds is another flour substitute for those who suffer from glutton allergies, since I am allergic to almonds I just made 2 cups of flour.

Lemon Glaze

1 cup of confectioners' sugar, sifted
2-4 tablespoons of fresh lemon juice

Directions

1. Preheat the oven to 350F. Grease and line a 10-inch loaf pan
2. Sift the flour and baking powder into a bowl. In a separate bowl, cream the butter and sugar together until pale and fluffy. Gradually beat in the eggs and milk, then fold in the flour, ground almonds, ginger, and lemon zest
3. Spoon the mixture into the prepared pan and smooth the surface. bake in the oven for 55-60 minutes, or until firm to the touch and a skewer inserted in to the center comes out clean.
4. Cool in the tin for 10 minutes, then turn out onto a wire rack and leave to cool completely.
5. In a small bowl, whisk together the confectioners' sugar and 2 tablespoons of lemon juice. The mixture should be thick but pourable. If it is too thick, add up to another 2 tablespoons of lemon juice and whisk again. Pour the glaze on top of the loaf, allowing it to drip at the sides. Let it harden about 15 minutes before serving.

--------------------------------~.~.~.~.~.~.~.~.~.~.--------------------------------

Reasons why scones are my new favorite baked good:
1. Easy - no fancy techniques required;
2. Fast - less than 30 min!
3. Delicious - du-uh
4. No mixer, blender, food processor, necessary;
5. Perfect for snacks
6. Perfect for breakfast - and lunch, and dinner, and....well, you get my point;
7. No sink full of dishes - yay
8. Did I say delicious already? Oh well, it's true. This one was so moist and tangy and crunchy. Yum!

Reasons enough, right? =)

-Ana

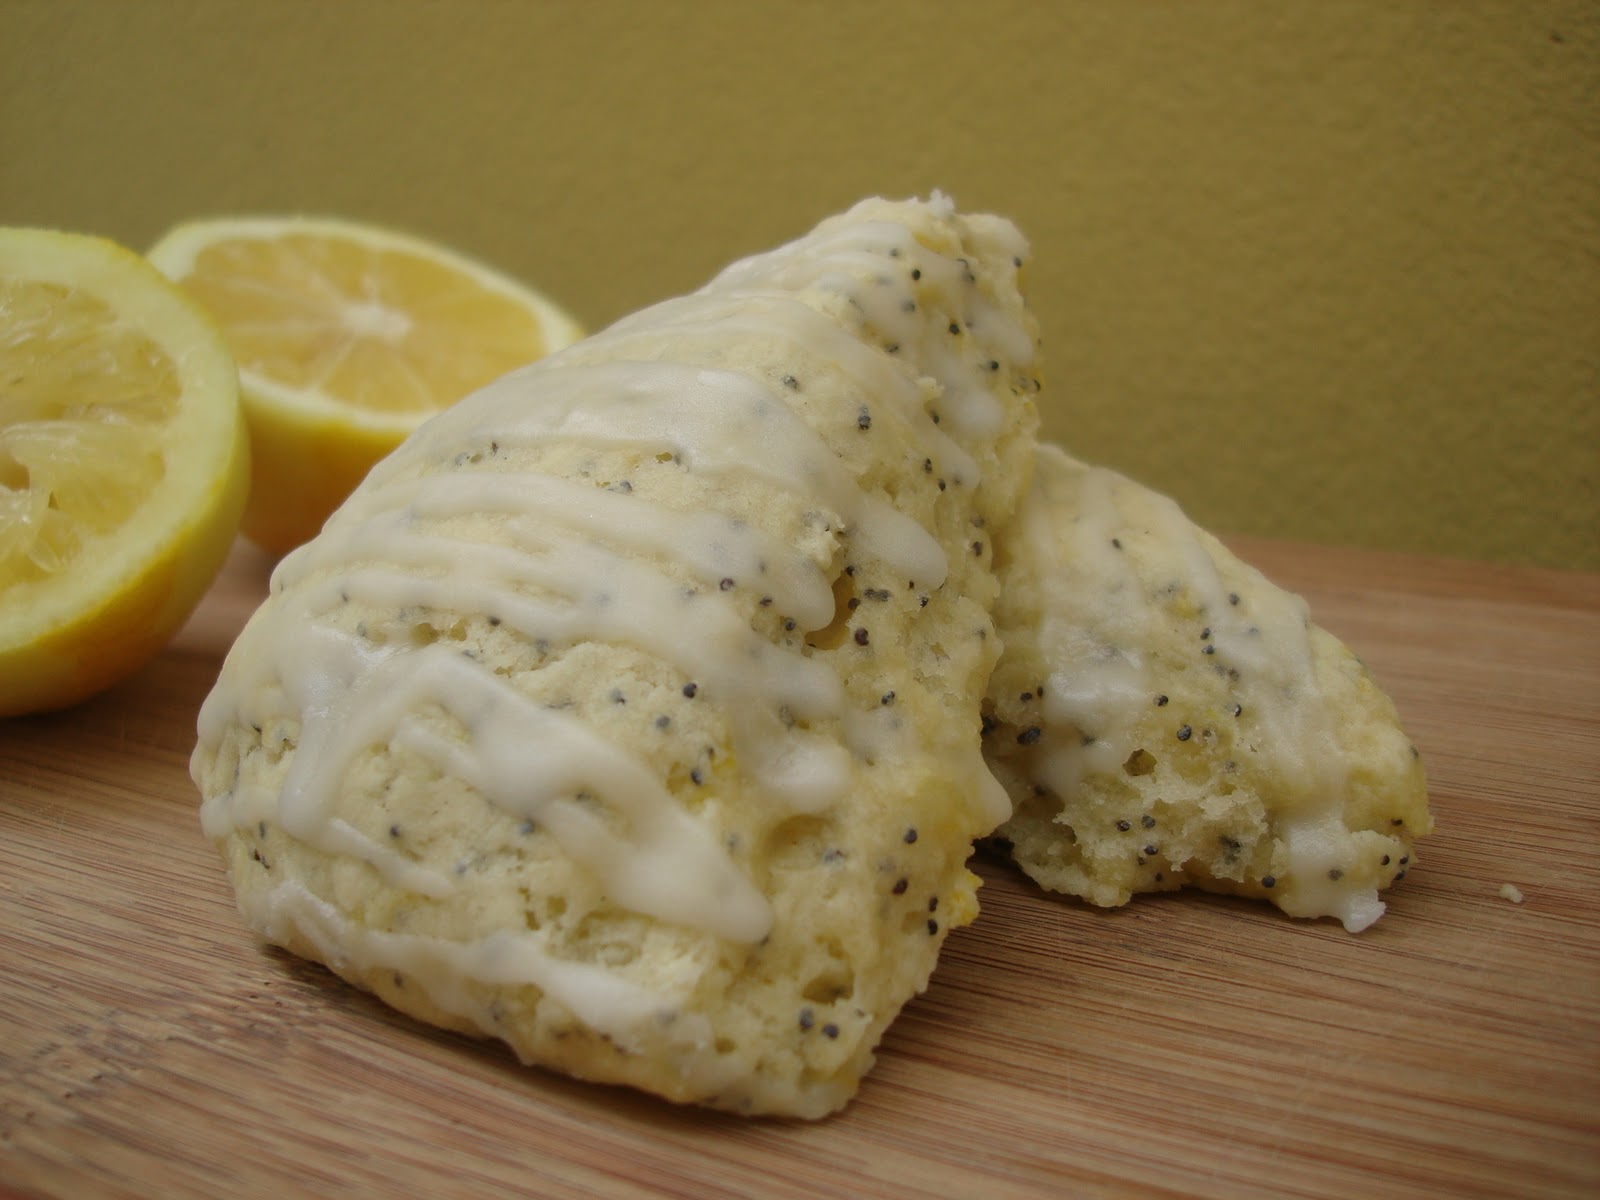
Lemon Poppyseed Scones

Adapted from here. My personal notes are in italics.
2 cups flour
1/3 cup sugar
2 teaspoons baking powder
1/8 teaspoon salt
1/3 cup chilled butter
1 beaten egg
1 teaspoon vanilla extract
1/2 cup heavy cream (I used low fat yogurt)
2 Tablespoons fresh lemon zest
1 Tablespoon poppy seeds

Egg Wash
1 beaten egg
1 Tablespoon heavy cream

1. In a large bowl, combine the dry ingredients. Using a pastry blender, cut the butter into the dry ingredients until the butter pieces are smaller than the size of peas. Stir in the lemon zest and poppy seeds.
2. In a small bowl, stir together the cream, egg, and vanilla. Add this to the dry ingredients and mix until just combined. It is important that you do not over mix the mixture. Once the liquid is absorbed and the dough is coming together (only a little dry flour in bottom of bowl), then stop.
3. Dough will be a little crumbly — remove from bowl and knead until it holds together. Pat the dough into a 7″ circle that is 1 1/2″ thick. Cut into 8 triangles. Place scones onto a greased cookie sheet (I lined mine with parchment). Brush tops and sides with egg wash. I completely forgot the egg wash. Maybe that's why my scones didn't get brown.
4. Bake at 375F for 15 minutes.
5. Let it cool down a bit and drizzle with Lemon Glaze (check Ann's recipe above). (Optional but highly recommended ;]).

Monday, August 30, 2010

The inspiration for this next baked goodie actually comes from Starbucks. Before we began this blog, we had compiled a list of possible cakes, cookies, and cupcakes that we're going to do for the next few months. We ended up talking about how delicious the cakes look in Starbucks, especially the Raspberry Swirl Pound Cake, so we decided to make our own raspberry pound cake and see how well it would turn out. We first visited our local Starbucks and tried the raspberry pound cake, and their lemon and poppy seed loaf. The raspberry swirl cake that we had looked rather pathetic compared to the one shown on the website, and naturally we were convinced we could bake a better cake by making it a Raspberry Swirl Lemon Cake. Well at the end of our baking session, we ended up making two pound cakes. The first one did not turn out as marble-ly as we would have liked it, and the second one turned out great, but looked a lot like our Starbucks Raspberry Swirl Pound Cake.


There are two elements to this recipe: the lemon cake, and the raspberry swirls, which is a raspberry sauce. The lemon cake recipe was taken from The Joy of Baking website. We followed the recipe but omitted the poppy seeds. As for the raspberry sauce, that was taken from Betty Crocker's Book, Basics: How to Cook and Entertain With Confidence. All other changes that we made to the recipe are in italics. Our initial plan was to divide the lemon batter, and mix half with the raspberry sauce. Unfortunately the batter turned out more purple than pink (that's where food colouring and artificial flavour is quite useful) so we did not get the marble effect we were hoping for, but with the second batch there was more of an emphasis on creating swirls, which turned out quite beautifully.

Raspberry Swirl Lemon Cake


Lemon Cake

3 large eggs
1 1/2 teaspoon pure vanilla extract
1/4 cup (60 ml) milk
1 1/2 cups (195 grams) all-purpose flour sifted
3/4 cup (150 grams) granulated white sugar
1 teaspoon baking powder
1/4 teaspoon salt
1 tablespoon grated lemon zest (outer yellow skin of the lemon)
13 tablespoons (184 grams) unsalted butter, softened

Lemon Syrup

1/4cup (60 ml) fresh lemon juice
1/3 cup (65 grams) granulated white sugar

Raspberry Sauce

1 1/2 tablespoons sugar
1 teaspoons cornstarch
3 tablespoons of water
5 ounces of frozen raspberries in syrup, thawed and undrained

Directions

1.Begin with the raspberry sauce. Mix the sugar and cornstarch in the saucepan. Stir in water and raspberries. Cook over medium heat, stirring constantly, until the mixture thickens and boils.

2. Continue boiling for 1 minute, stirring constantly. Remove the saucepan from heat.


3. Strain the sauce through a strainer to remove the raspberry seeds. Let it cool.


4. Preheat oven to 350 degrees F (180 degrees C) and place the oven rack in the center of the oven. Butter and flour the bottom and sides of a loaf pan (8 x 4 x 2 1/2 inch) (20 x 10 x 7 cm).

5. In a bowl, whisk together the eggs, vanilla extract, and milk.

6. In the bowl of your electric mixter, or with a hand mixer, beat the flour, sugar, baking powder, salt and lemon zest until combined. Add the softened butter and half the egg mixture and mix on low speed unitl moistened. Increase the speed to medium and beat for about one minute. (This aerates and develops the cake's structure.) Scrape down the sides of the bowl and add the remaining egg mixture in two batches, beating about 30 seconds after each addition. (This will strengthen the structure of the batter.)

7. Pour half of the batter in the prepared pan. With the help of a spoon pour half of the raspberry sauce and use a knife to create the swirls. Pour the remaining batter and the remaining sauce and swirl.
That's not blood, we swear!
8. Bake for about 55 to 65 minutes or until the bread is golden brown and a tooth pick inserted in the center comes out clean. Ours took 30-35 minutes, so keep an eye after 30 minutes.


9. Meanwhile, in a small saucepan, bring the sugar and lemon juice to a boil, stirring until the sugar dissolves. When the bread is done, remove from the oven and place on a wire rack. Pierce the hot loaf all over with a wooden skewer or toothpick and then brush the top pf the loaf with about half of the hot syrup. Cool the loaf in the pan for about 10 minutes then invert onto a greased wire rack. Brush the remaining syrup onto the bottom and the sides of the loaf. Reinvert the bread so it is right side up and then cool the bread completely before wrapping. Store at least overnight before serving to allow the lemon syrup to distribute throughout the loaf.
First Batch
Second Batch
Ann's Thoughts

I've had lemon pound cake a millions times before but I've never had the change to make one. When we were making the cake, we were kind of skeptical that one tablespoon of lemon rind would actually make the cake lemony, I even suggested to Ana that we should add some lemon juice to the batter, but she insisted that we stick to the recipe, (after all, we were risking it with the raspberry sauce.) It was a good thing we went by the recipe because surprsingly we could actually taste the sweet, tangy, lemon flavour.

Out of the three recipes that we've done so far, this cake is by far our most experimental. We could not find a lemon raspberry pound cake recipe so when we decided to make this cake, we had to figure out how to make the raspberry swirls. Using jelly was one possibility, but I suggested that a raspberry sauce would probably do the trick. Making the raspberry sauce was ridiculously fast, easy, and is excellent for drizzling on top of cakes, brownies, and ice cream for an extra sweet treat.

Ana's Thoughts

More sugar! Oh my, after a week eating sugar everyday (i.e. pancakes, ice cream, cupcakes, cinnamon buns, and more ice cream. =O), here comes our baking-for-the-blog –weekend and guess what? More sugar, this time in the form of cake. Raspberry swirl lemon cake to be more exact. But I don’t mind. It’s for the blog so it’s for a good cause. *wink*

This week we baked at my new place. =D Despite the small space, the lack of some utensils and a different oven, everything went fine. Well, almost everything. (Ha! I bet you were finding it weird that nothing went wrong this time.) We had to make the recipe twice, as Ann said in the beginning, because we had a problem with the marbling. Both tasted good, though. So lemony and moist and fluffy. Hmmm. My mouth is watering just writing this. Okay, I’m having another piece right now. See you next week!

P.S.: They aren’t too sweet, so I guess this doesn’t count as sugar. ;) (Yeah, right.)

Receita em Português:


Bolo de Limão
3 ovos
1 1/2 colher (chá) de baunilha
1/4 xíc.(60 ml) de leite
1 1/2 xíc. (195 g) de farinha de trigo
3/4 xíc. (150g) de açúcar
1 colher (chá) fermento em pó
1/4 colher (chá) de sal
1 colher (sopa) de raspas de limão
3 colheres (sopa) de sementes de papoula (opcional)
13 colheres (sopa) (185g) de manteiga sem sal, temperatura ambiente

Calda de Limão
1/4 xíc. (60 ml) de suco de limão
1/3 xíc. (65g) de açúcar

Calda de Framboesas
1 1/2 colher (sopa) de açúcar
1 colher (chá) de amido de milho
3 colheres (sopa) de água
140g de framboesas em calda, descongeladas


Modo de Preparo

Comece pela calda de framboesas. Combine o açúcar e o amido de milho em uma panelinha. Junte a água e as framboesas. Cozinhe em fogo médio, misturando constantemente, até ferver e engrossar.
Deixe ferver por mais 1 minuto, misturando constantemente, e retire do fogo.
Passe a calda por uma peneira para retirar as sementes e deixe esfriar.

Pré-aqueça o forno a 180ºC. Unte e enfarinhe uma forma de bolo inglês.
Em uma tigela, misture os ovos, o leite e a baunilha.
Na tigela da batedeira, bata a farinha, o açúcar, o fermento, o sal e as raspas de limão até combinar. Acrescente a manteiga e metade da mistura de ovos e bata em velocidade baixa até obter uma massa úmida. Aumente a velocidade pra média e bata por mais um minuto. Acresecente o restante dos ovos, em duas partes, batendo bem após cada adição.
Despeje metade da massa na forma e metade da calda de framboesas. Utilizando uma faca, faça movimentos de vai-e-vem para obter um efeito mesclado. Despeje a outra metade da massa e da calda e repita o processo.
Leve ao forno e asse por 55-65 minutos ou até dourar. O nosso bolo assou em 30-35 minutos. Fique de olho no forno após 30 minutos.

Enquanto isso, leve ao fogo os ingredientes da calda de limão e misture até o açúcar dissolver.
Quando o bolo estiver pronto faça furos com um garfo e pincele a calda de limão por todos os lados. Após esfriar, embale e deixe de um dia para o outro para que a calda umedeça todo o bolo.